Develop: Customer Aging
Estimated reading time: 24 minutesOverview
On this page, you will create a simple data pull using the Customer Aging Report. To review the business use case for this report, see Real World Walkthroughs - Customer Aging. This example begins with steps for creating the Interject data connection and data portals, followed by the steps on how to create the stored procedure. Finally, you will be directed to another page that shows how to use the data portal to create the spreadsheet report from scratch.
Note: This example uses Microsoft's Northwind Database. You can download this database here or you can use this example as a guide for your own data source.
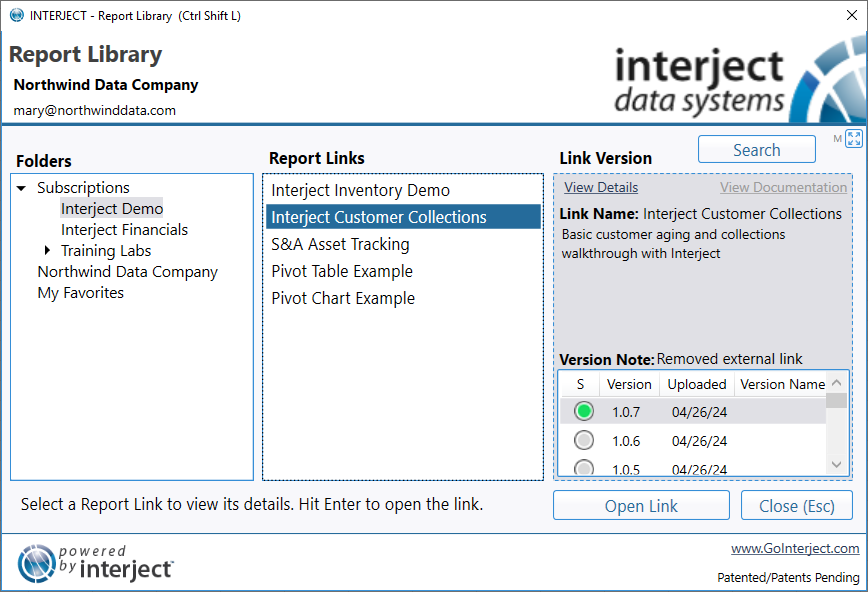
To work through this example, locate the Customer Collections link in the Interject Report Library.
Setting up the Data Connection
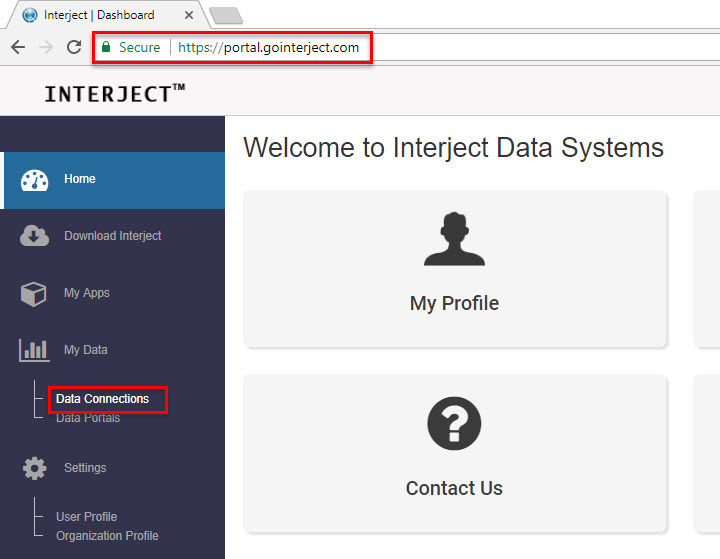
Step 1: Navigate to https://portal.gointerject.com and log in. Set up a data connection by clicking the Data Connections icon.
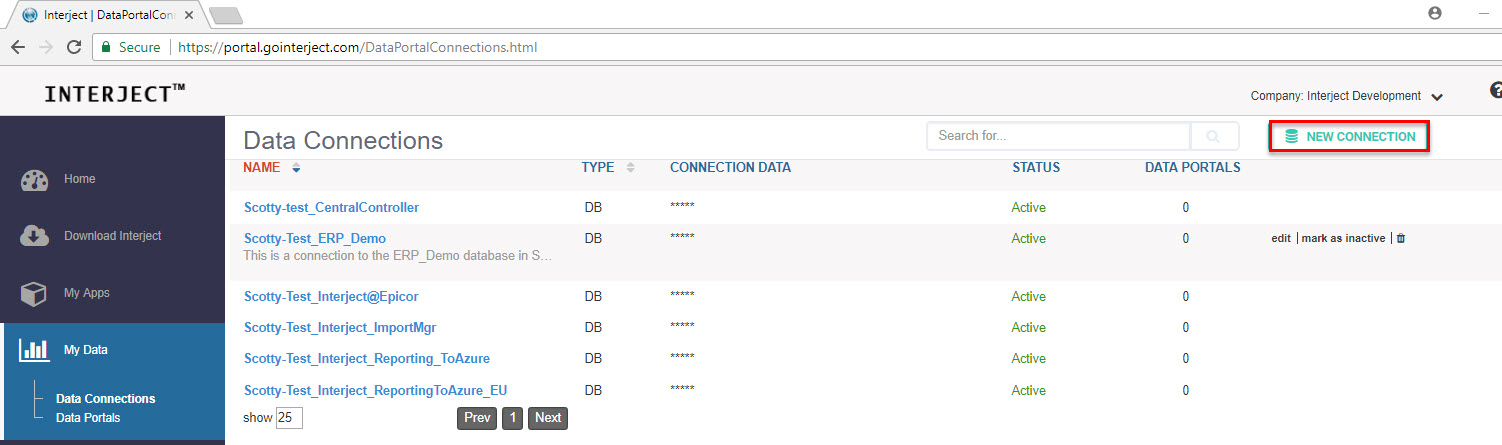
Step 2: On the Data Connections page, click the New Connection button.
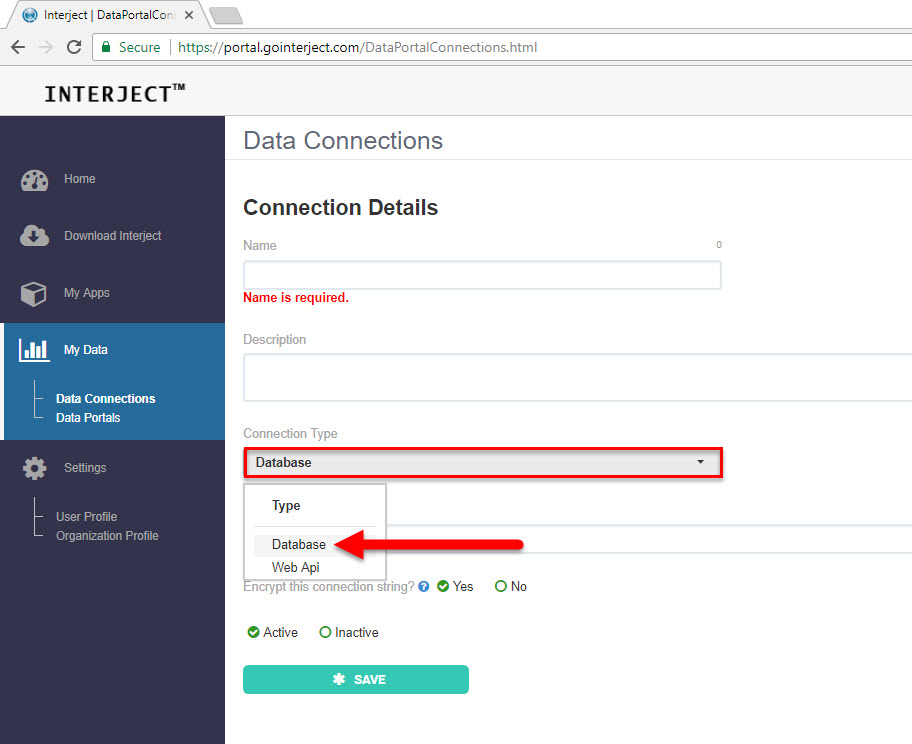
Step 3: In the Connection Type field, verify that Database is selected.
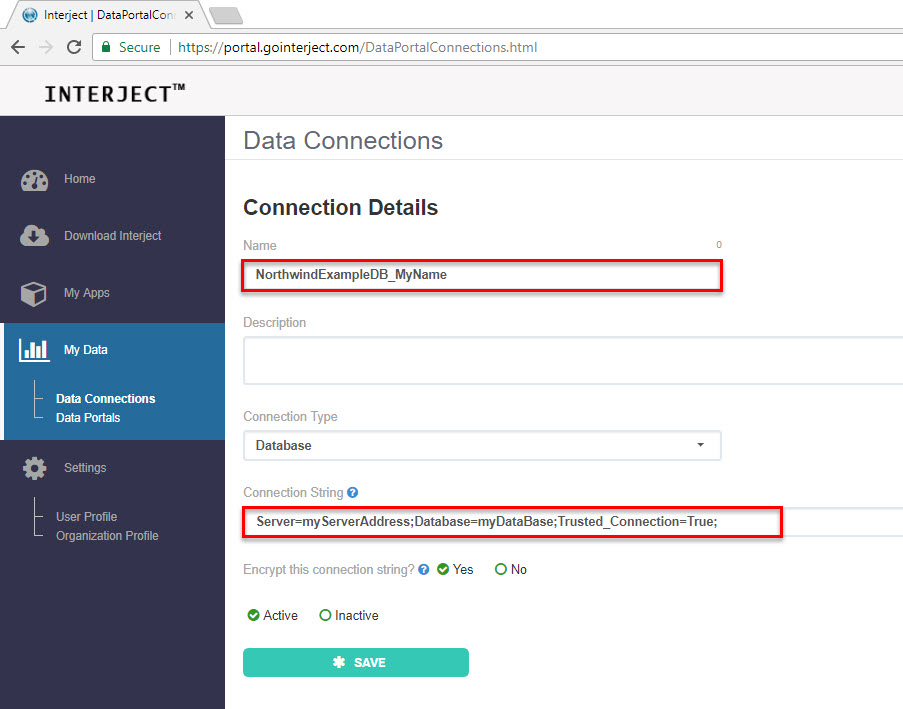
Step 4: The Connection Details page needs to contain the following information for the new connection. Type NorthwindExampleDB_MyName in Connection Name, but include your own name in the suffix. Each connection name must be unique. For the connection string, type Server=myServerAddress;Database=myDataBase;Trusted_Connection=True;. You are using Windows authentication, so username and password are not required. Replace the server name and database name to match your own that you are using for this walkthrough.
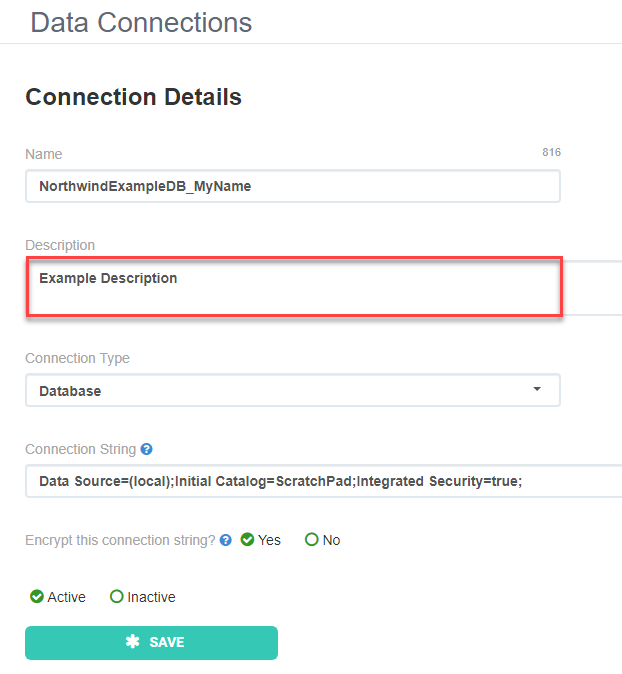
Step 5: In the Description field include details about what the data connection will be used for.
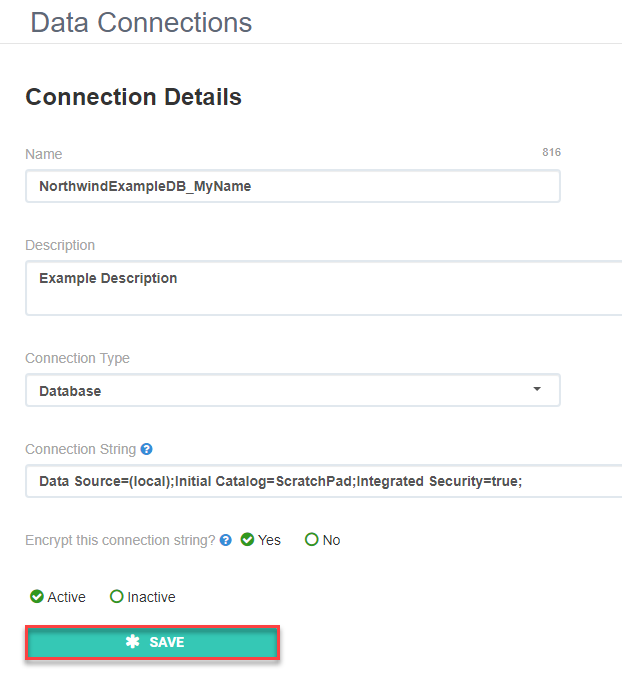
Step 6: Click the Save button to create the new data connection.
The Database Data Connection is now ready to be used in a Data Portal. You should always test a new connection with your security context. Follow the steps in Database Connection to test your connection string.
Setting up the Data Portal
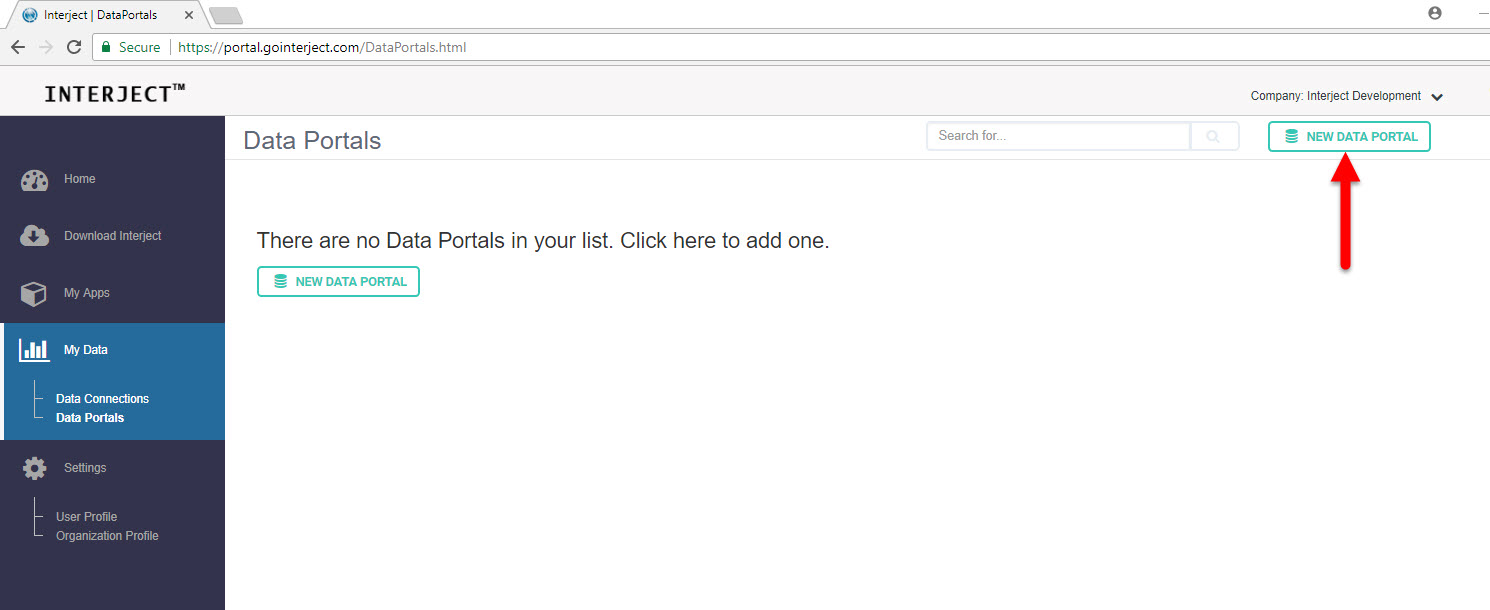
Step 1: To add a new data portal, return to https://portal.gointerject.com and select Data Portals from the sidebar menu.

Step 2: Click New Data Portal.
Step 3: Type NorthwindCustomers_MyName for the Data Portal Code. Since this field must be unique, replace "MyName" with your name. Select the connection that was made in the previous step. Also enter a name for the stored procedure [demo].[Northwind_Customers_Pull_MyName], which will be created later. Again, replace "MyName" with your name.
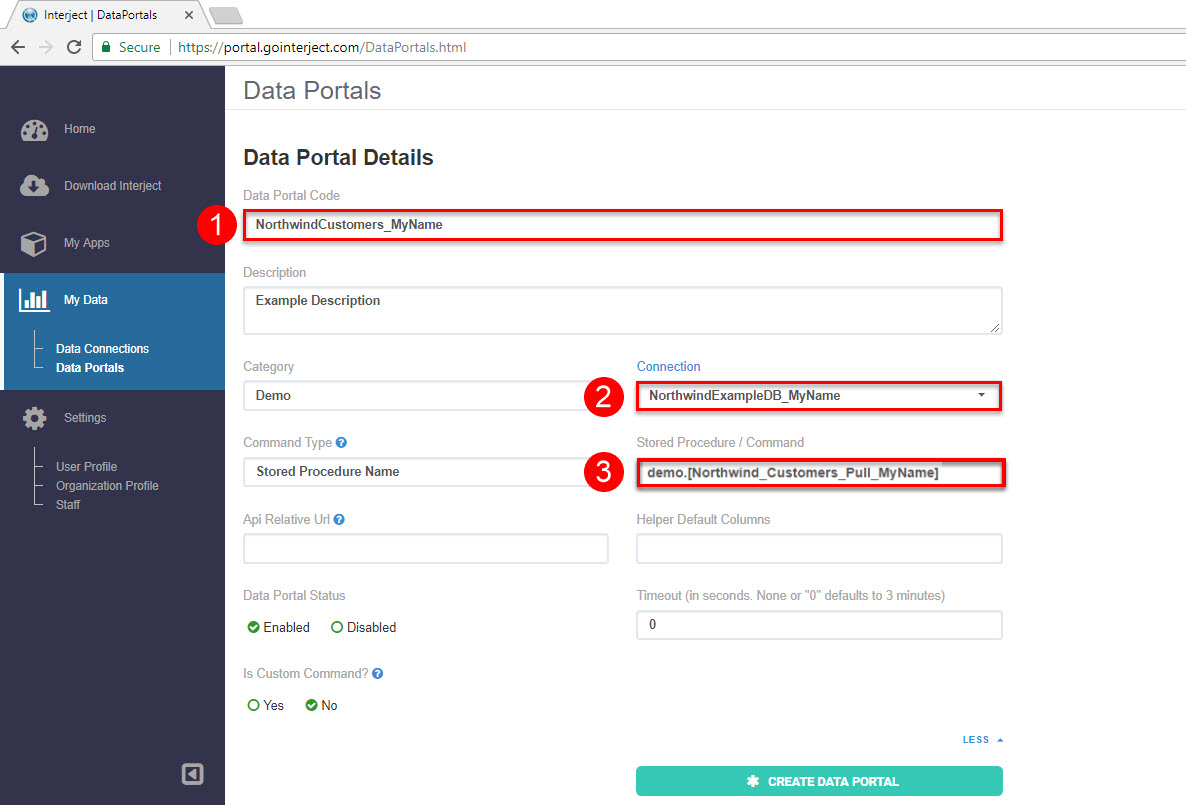
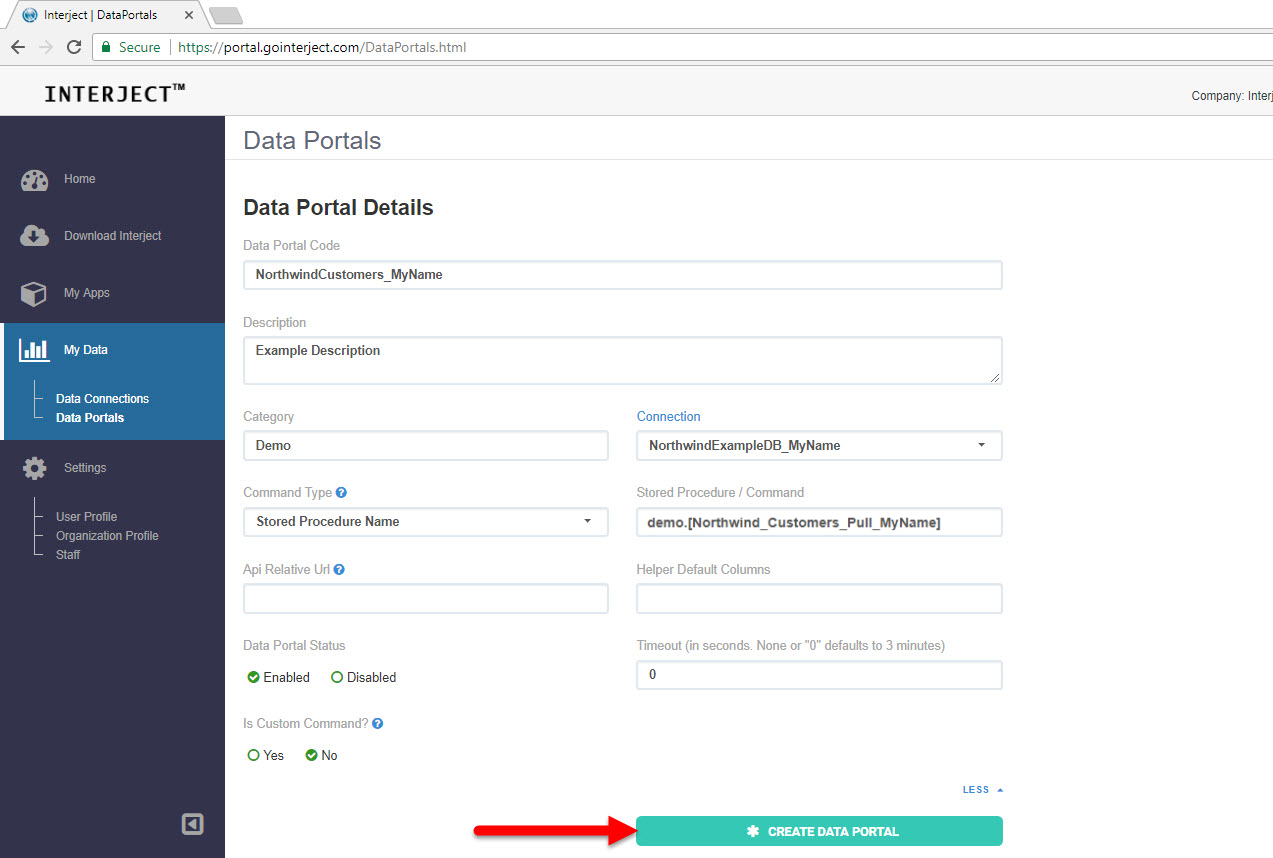
Step 4: Click Create Data Portal to save the new data portal. Additional options display after selecting the Create Data Portal button for adding parameters.
Note: If this is your first time setting up a data portal, review Data Portals, which describes the data portal parameters in more detail, including the difference between formula and system parameters. Proceed to the next step to continue.
Setting up Formula Parameters
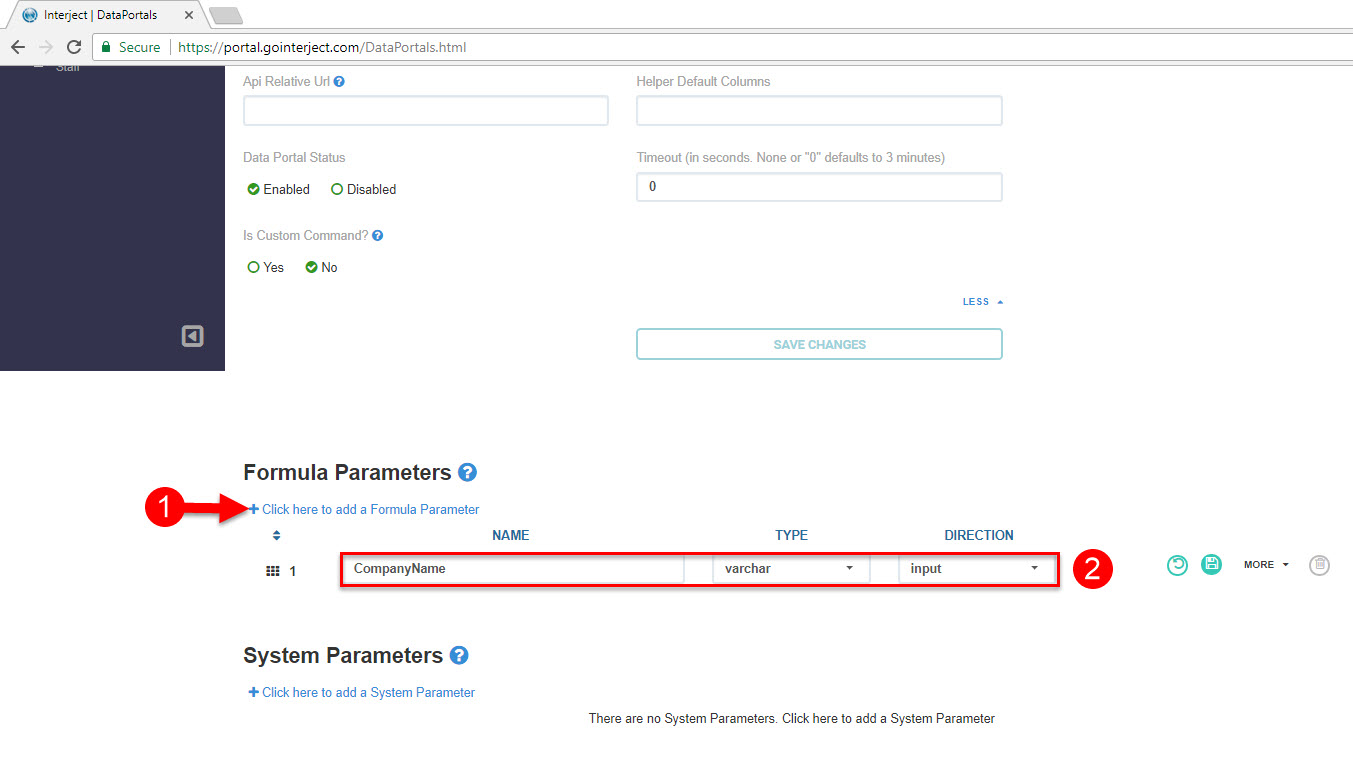
Step 1: To add your first formula parameter, click Click here to add a Formula Parameter. For this parameter, enter CompanyName for Name, varchar for Type, and input for Direction to input, as shown below.
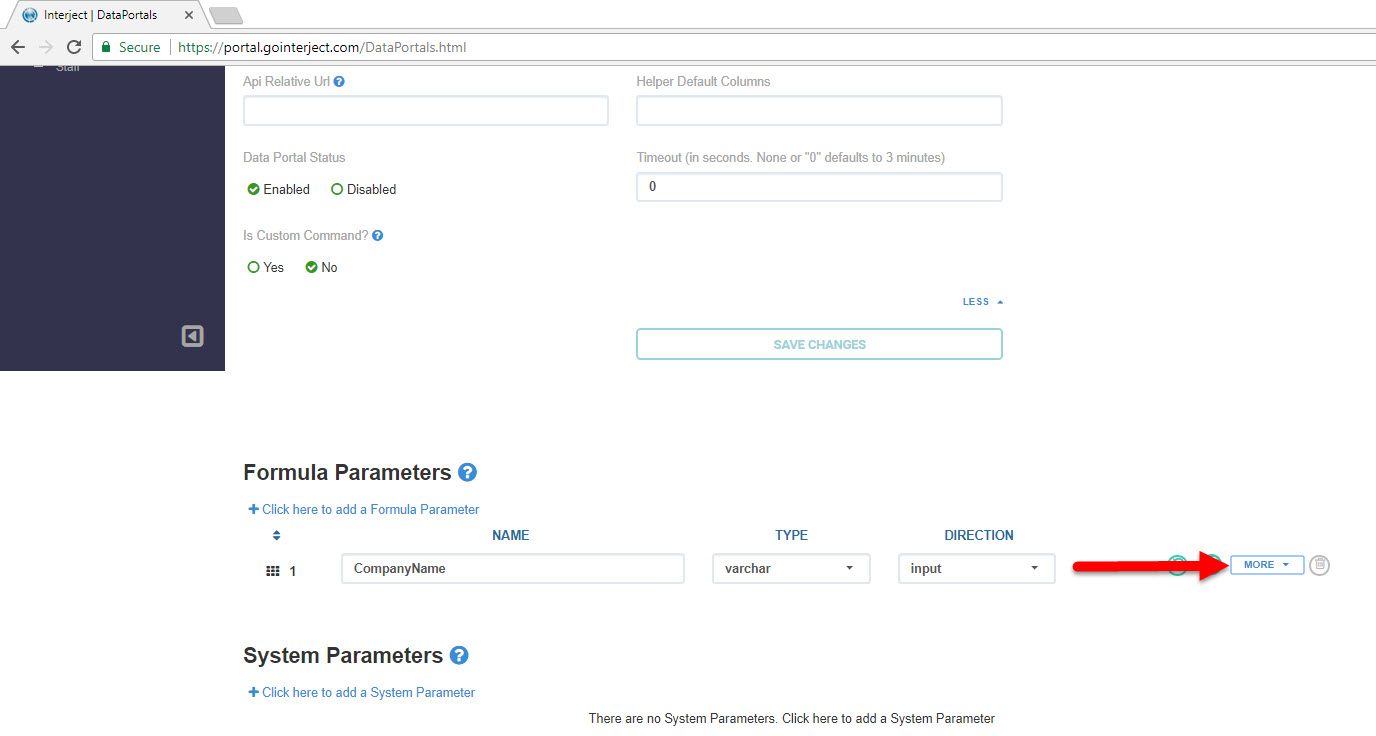
Step 2: Click the More button.
Step 3: As shown in the screenshot below, enter Market for Helper Default and Search is a wildcard that contains search for Comments. Click the Save icon.
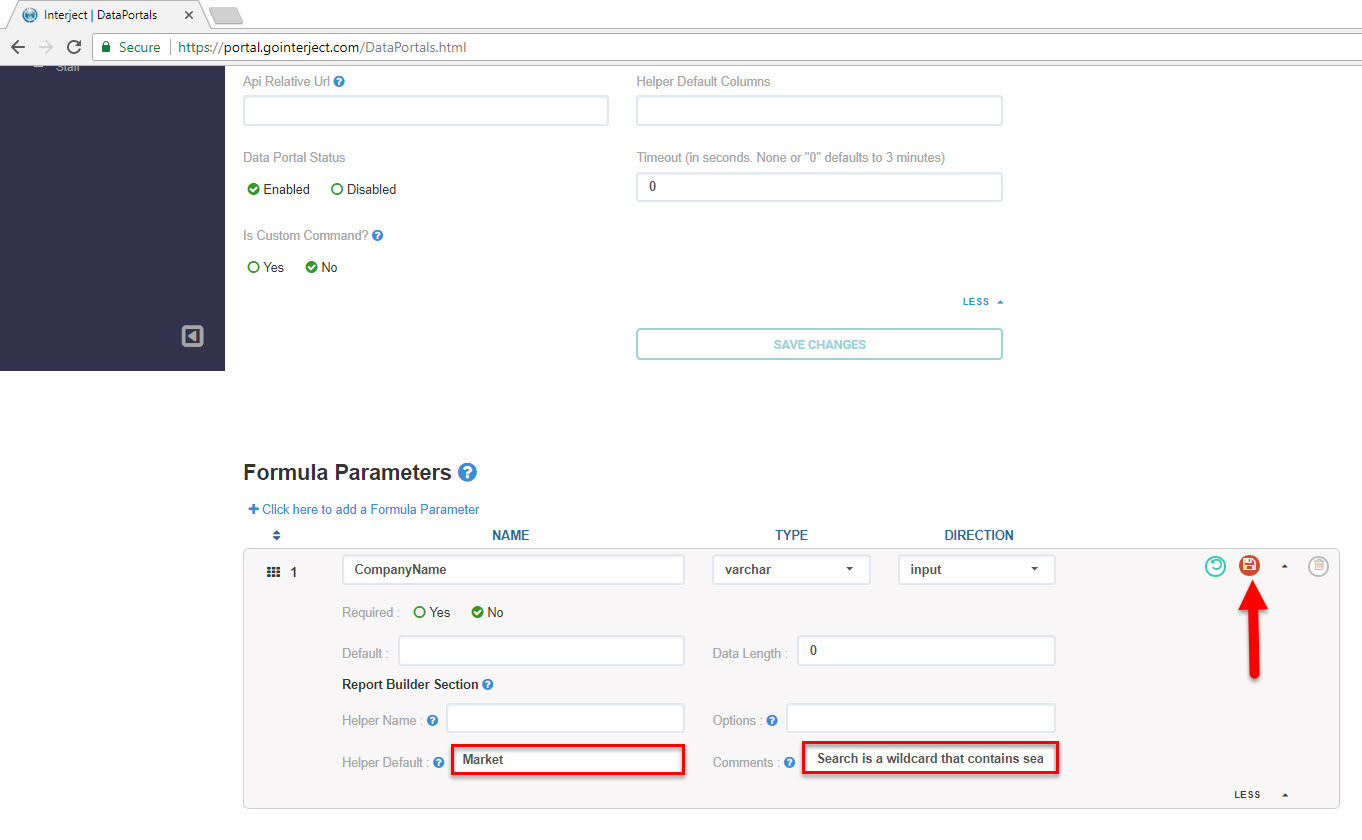
Note: When you set up a formula parameter, the **Save** icon is red until you save your changes. After your changes are saved, the **Save** icon turns green.
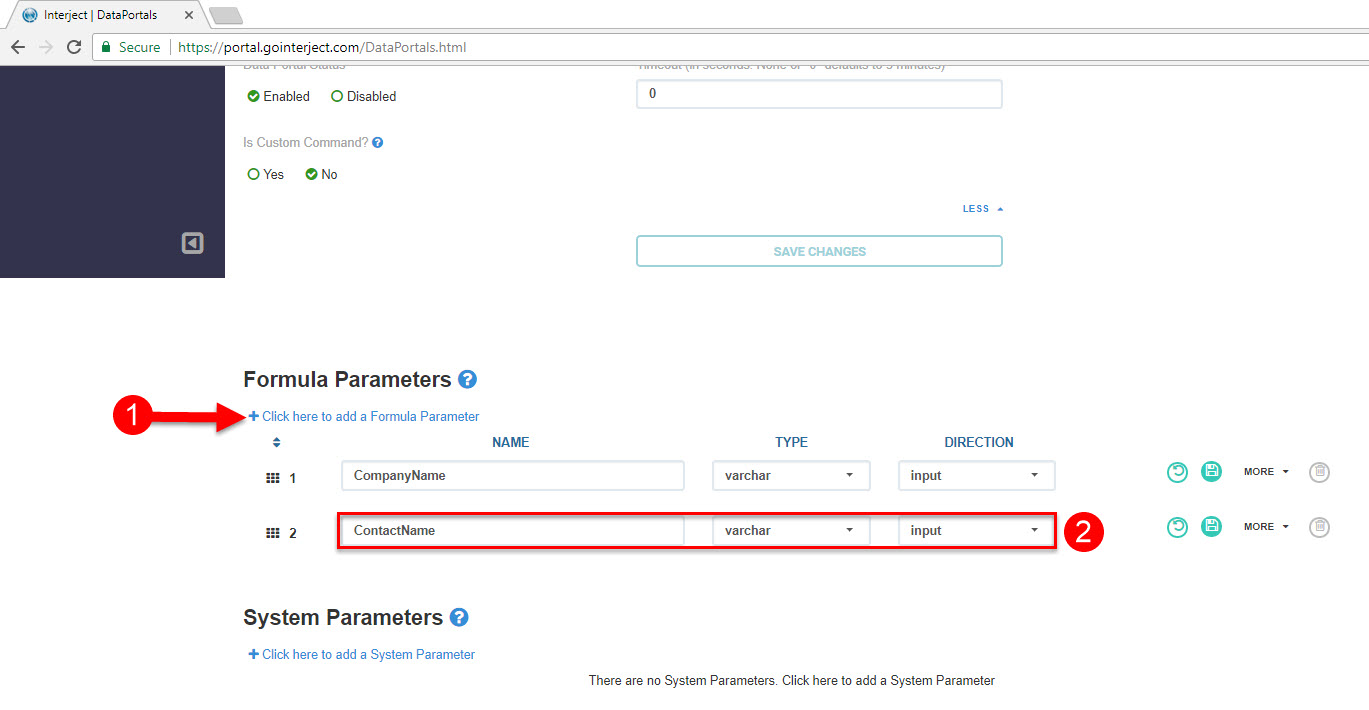
Step 5: Click the Click here to add a Formula Parameter to add the second parameter. Enter ContactName for Name, varchar for Type, and input for Direction.
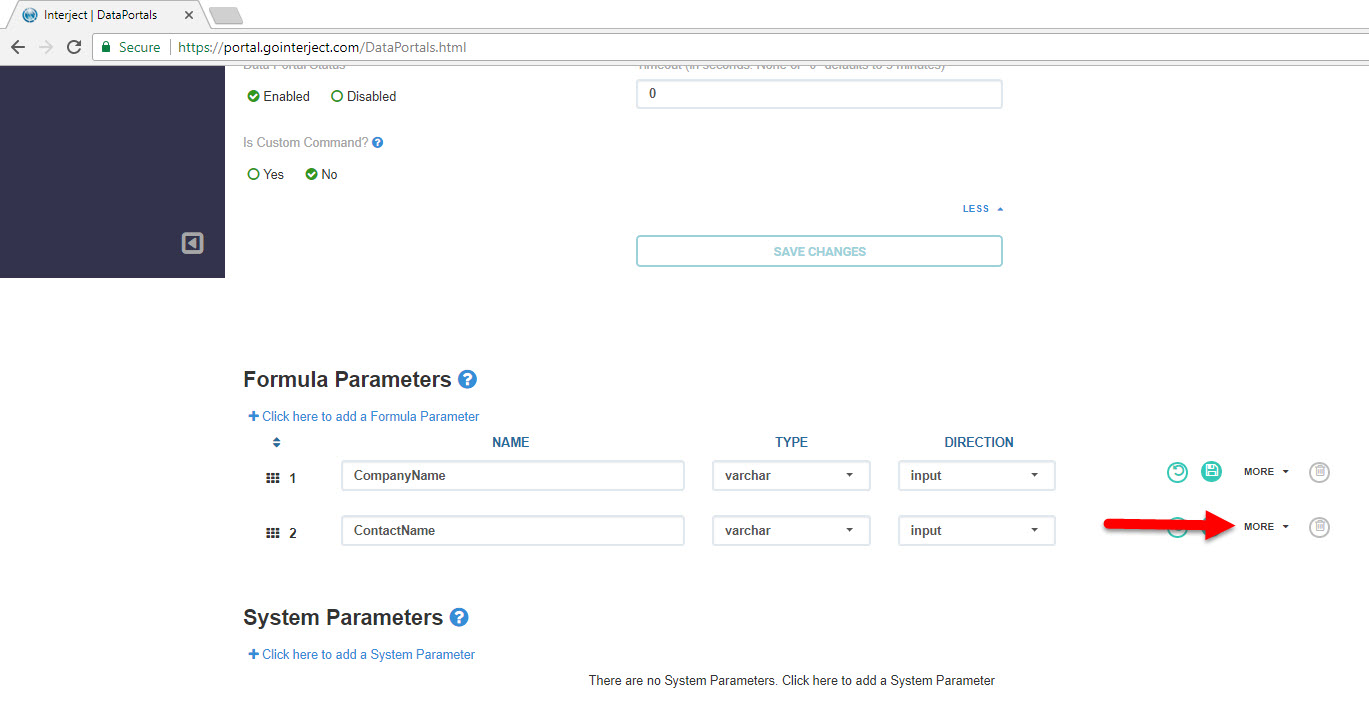
Step 6: Click the More button.
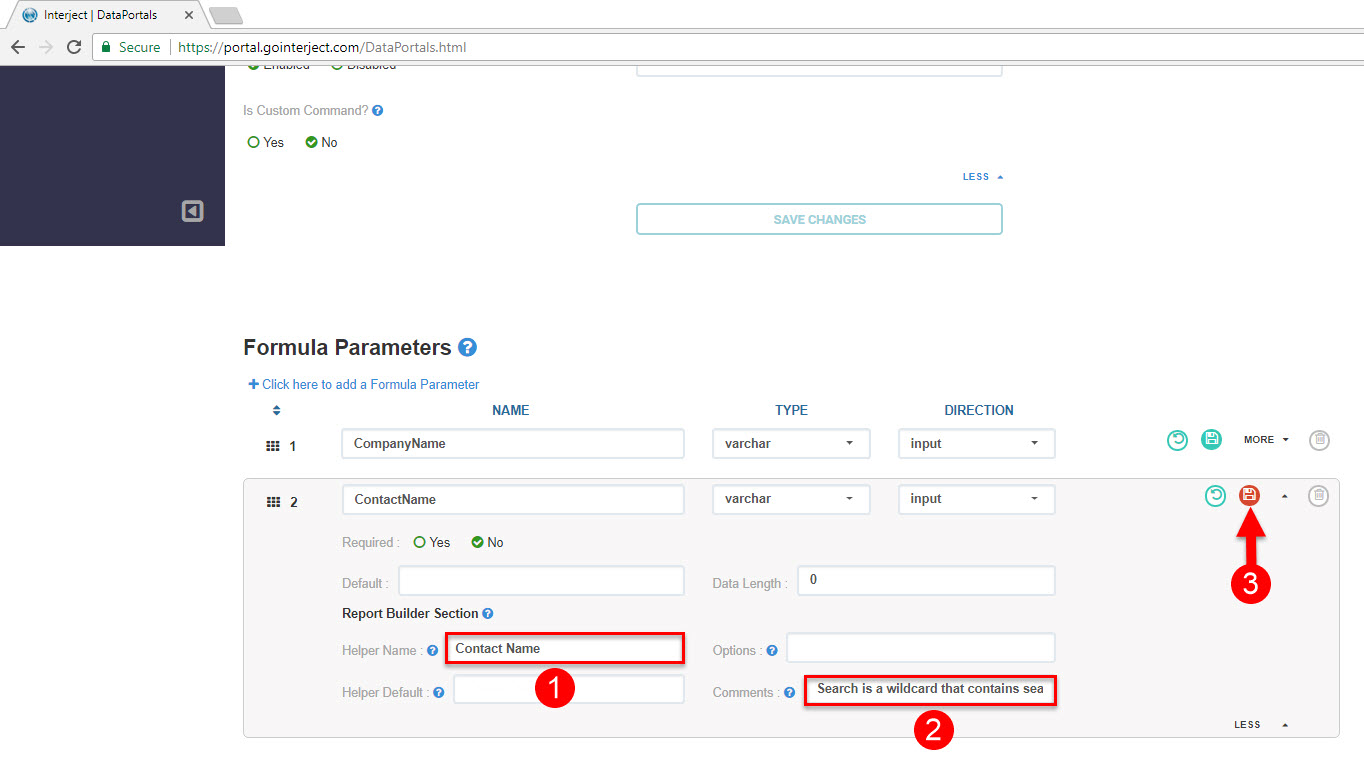
Enter Contact Name for Helper Name and Search is a wildcard that contains search for Comments. Click the Save icon.
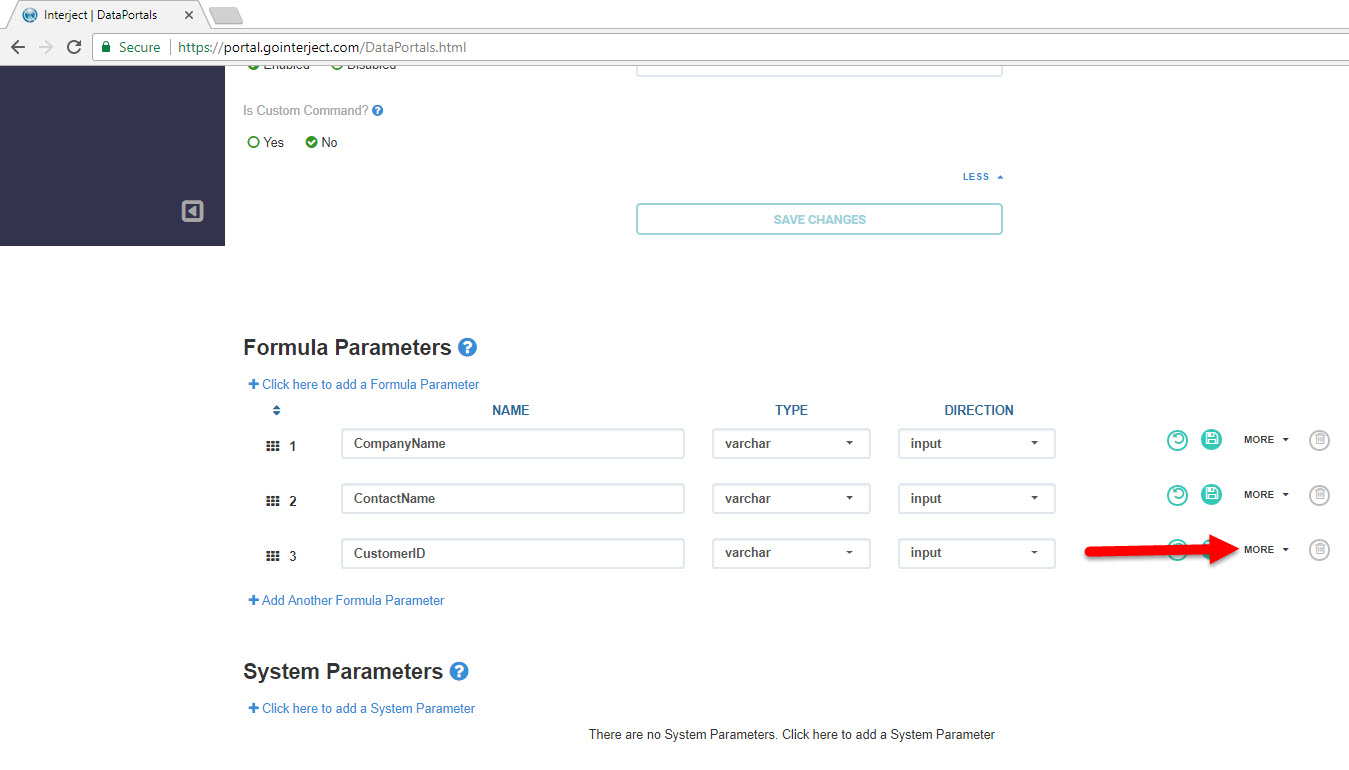
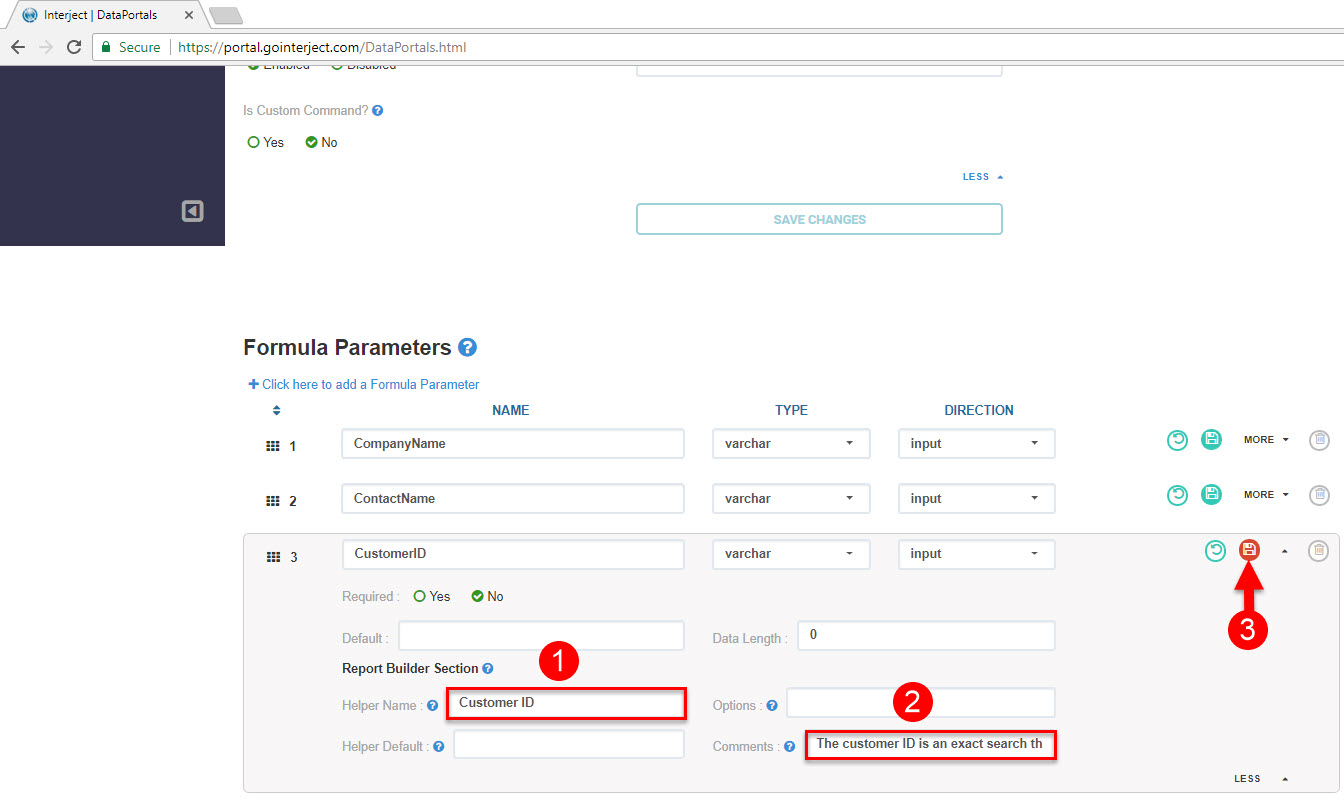
Step 7: To add the final Formula Parameter click Click here to add a Formula Parameter. Enter CustomerID for Name, varchar for Type, and input for Direction.
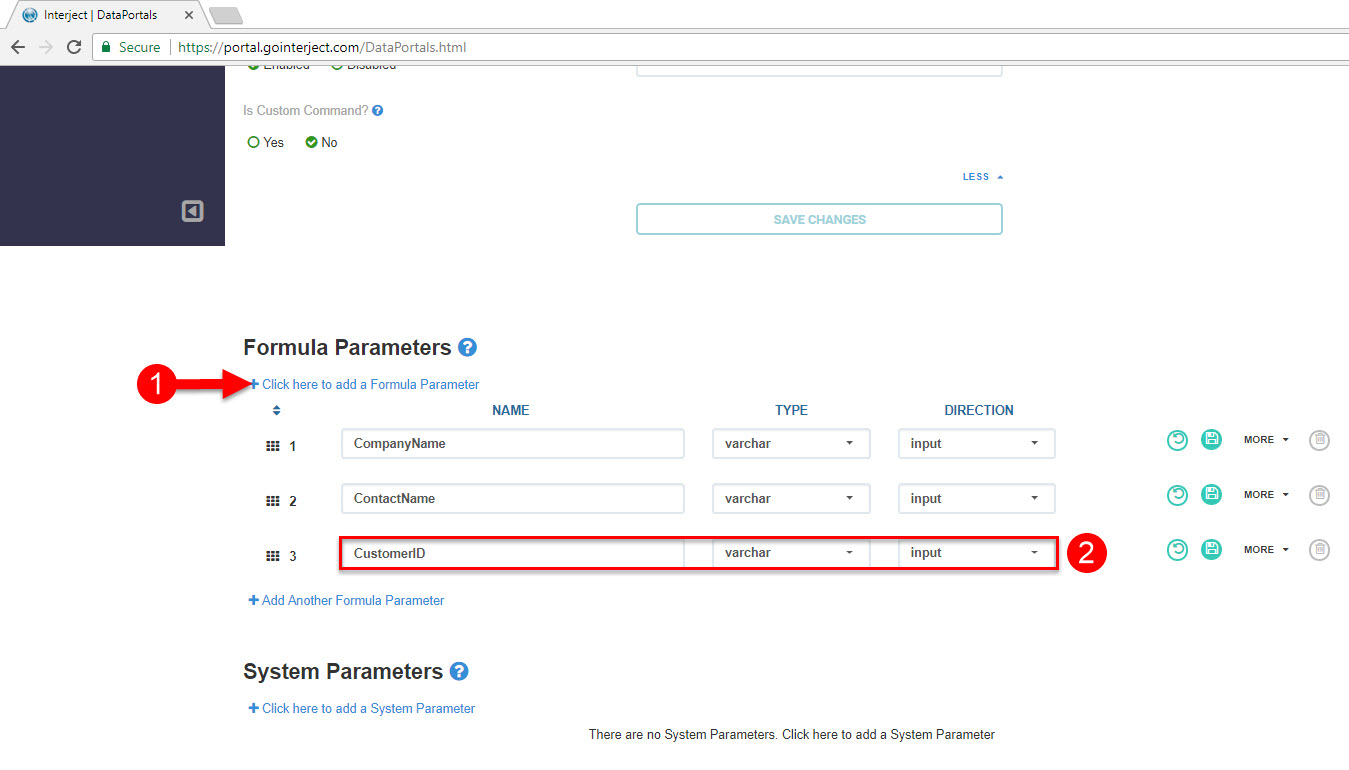
Step 8: Click the More button.
Enter Customer ID for Helper Name and The customer ID is an exact search that will be used by the drill for Comments. Click the Save icon.
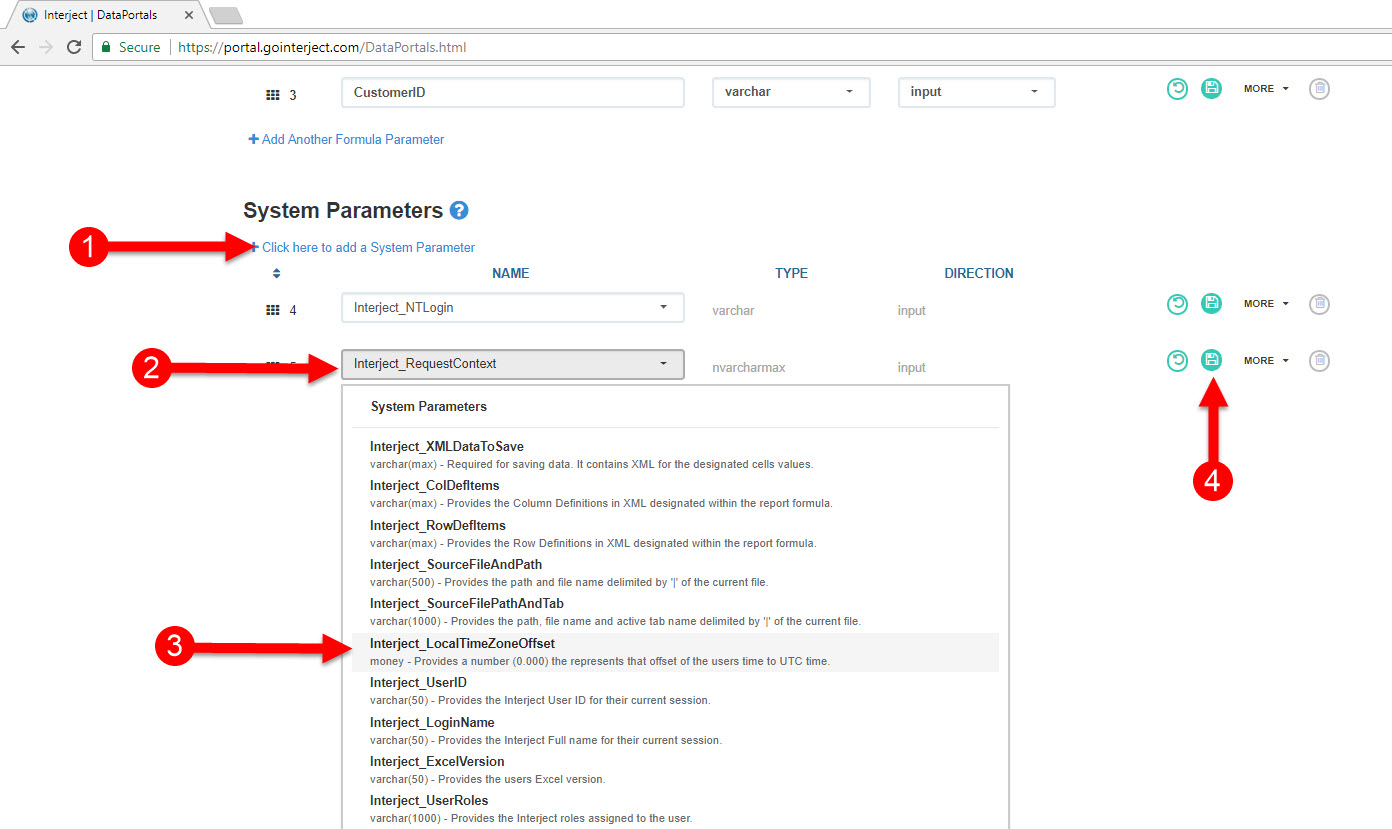
System Parameters
System parameters are similar to formula parameters, except the system parameter values are provided by the system instead of cells that are in the spreadsheet report. There are several system parameters that aid in communication with the middle-tier service. In this case, a stored procedure is used. See Data Portals in Interject Website Portal for more information.
In this example, you will use the system parameter, Interject_NTLogin, which passes the user’s Windows login. This is helpful for implementing row-level security; however, the best practice is to use SQL Server built-in functions like sysname() when available. You are also using Interject_LocalTimeZoneOffset , which provides the numeric offset in hours between the user’s profile time zone setting and universal time. The Interject_LocalTimeZoneOffset parameter is used to convert date and time values to the user’s time zone.
Step 1: To add a new system parameter, click Click here to add a System Parameter button. Choose Interject_NTLogin for the name of the first parameter. Click Save.
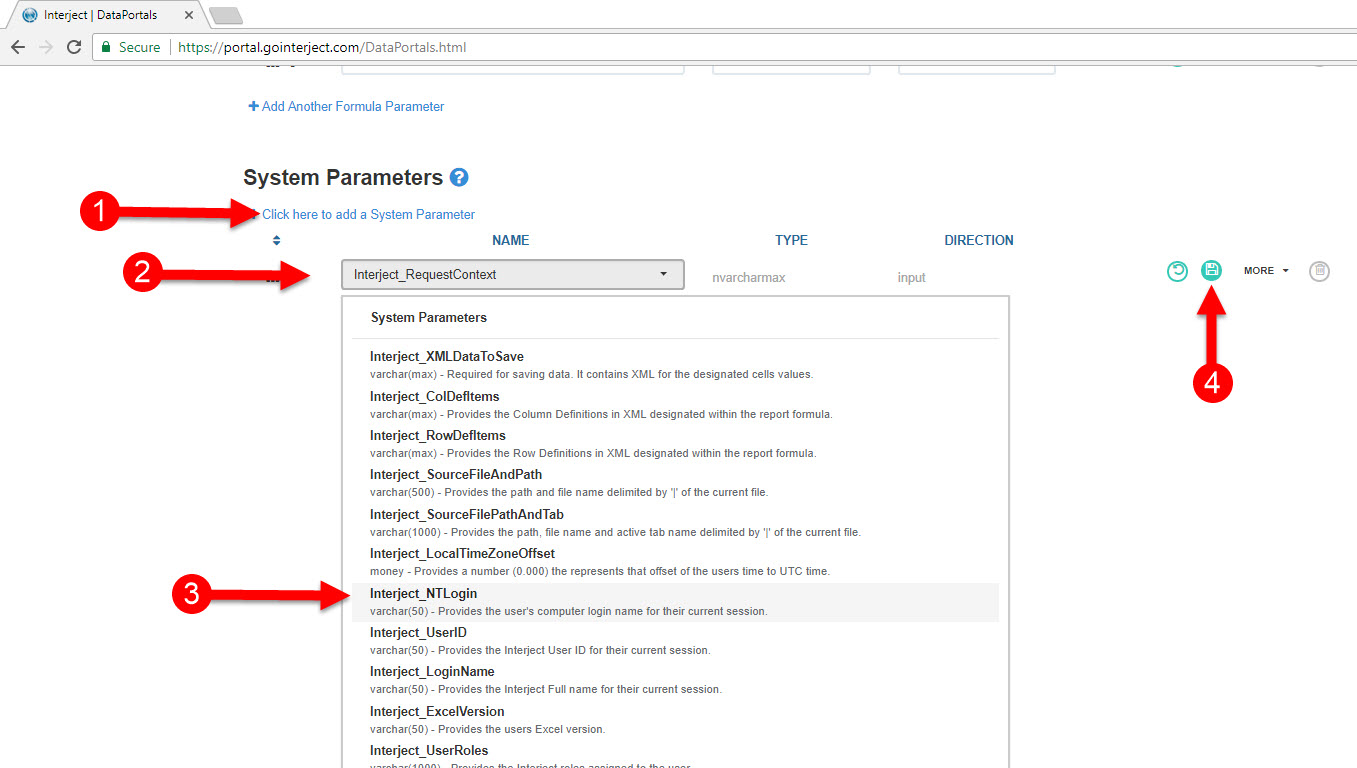
Step 2: Add a second system parameter by clicking Add a System Parameter button. Choose Interject_LocalTimeZoneOffset for the name and click Save.
Creating the Stored Procedure
A stored procedure or data API serves as a middle tier for an Interject report. In this example you will be using a stored procedure. Interject can retrieve one or more result sets from a stored procedure into the spreadsheet report.
The Interject Website Portal allows you to create and manage Data Portals and reference stored procedures you create. Data Portals are stored locally in your Excel session when you log into Interject. When requesting data Interject creates a point-to-point connection with the intended data source.
The below steps assume you are proficient with SQL Management Studio for Microsoft SQL Server and in creating stored procedures. If you need additional training in this area, please contact us at info@gointerject.com.
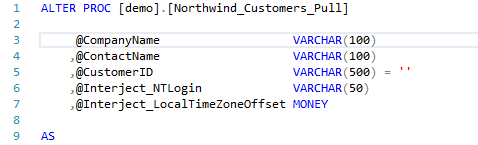
Step 1: Create a stored procedure called [demo].[Northwind_Customers_Pull_MyName] using the following code example (replace "MyName" with your name):
CREATE PROC [demo].[Northwind_Customers_Pull_MyName]
@CompanyName VARCHAR(100)
,@ContactName VARCHAR(100)
,@CustomerID VARCHAR(500) = ''
,@Interject_NTLogin VARCHAR(50)
,@Interject_LocalTimeZoneOffset MONEY
AS
BEGIN
SET NOCOUNT ON -- helps reduce conflicts with ADO
DECLARE @DateCompare VARCHAR(20) = '1997-09-15'
DECLARE @ErrorMessage VARCHAR(100)
IF LEN(@CompanyName)>40
BEGIN
SET @ErrorMessage = 'Usernotice:The company search text must not be more than 40 characters.'
RAISERROR (@ErrorMessage, 18, 1)
RETURN
END
--CREATE CTE to consolidate the invoice data into separate categories based on date
;WITH Invoice_CTE
AS
(
SELECT
CustomerID
,SUM(InvoiceTotal) AS InvoiceTotal
,SUM([Current]) AS [Current]
,SUM([30Days]) AS [30Days]
,SUM([60Days]) AS [60Days]
,SUM([90Days]) AS [90Days]
,IsPaid
FROM
(
SELECT
i.CustomerID
,i.InvoiceDate
,i.InvoiceTotal
,CASE WHEN DATEDIFF(dd,i.InvoiceDate,@DateCompare) < 30 THEN (i.InvoiceTotal) ELSE 0 END AS [Current]
,CASE WHEN DATEDIFF(dd,i.InvoiceDate,@DateCompare) between 30 and 59 THEN (i.InvoiceTotal) ELSE 0 END AS [30Days]
,CASE WHEN DATEDIFF(dd,i.InvoiceDate,@DateCompare) between 60 and 89 THEN (i.InvoiceTotal) ELSE 0 END AS [60Days]
,CASE WHEN DATEDIFF(dd,i.InvoiceDate,@DateCompare) > 90 THEN (i.InvoiceTotal) ELSE 0 END AS [90Days]
,IsPaid
FROM [demo].[Northwind_Invoices] i
WHERE IsPaid = 0 --This line selects the invoices that have not been paid
) t
GROUP BY CustomerID, IsPaid
)
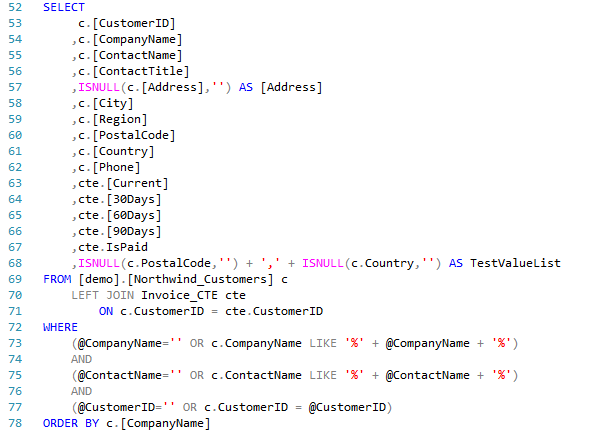
SELECT
c.[CustomerID]
,c.[CompanyName]
,c.[ContactName]
,c.[ContactTitle]
,ISNULL(c.[Address],'') AS [Address]
,c.[City]
,c.[Region]
,c.[PostalCode]
,c.[Country]
,c.[Phone]
,cte.[Current]
,cte.[30Days]
,cte.[60Days]
,cte.[90Days]
,cte.IsPaid
,ISNULL(c.PostalCode,'') + ',' + ISNULL(c.Country,'') AS TestValueList
FROM [demo].[Northwind_Customers] c
LEFT JOIN Invoice_CTE cte
ON c.CustomerID = cte.CustomerID
WHERE
(@CompanyName='' OR c.CompanyName LIKE '%' + @CompanyName + '%')
AND
(@ContactName='' OR c.ContactName LIKE '%' + @ContactName + '%')
AND
(@CustomerID='' OR c.CustomerID = @CustomerID)
ORDER BY c.[CompanyName]
END
Step 2: Stored procedures are natively supported by Interject. There are a few key areas to note in the code example that help illustrate Interject features.
- Parameters: The parameters included in the stored procedure are the same that were added to the Data Portal in the previous steps. On each request, Interject passes the Formula Parameters values from the spreadsheet configuration along with System Parameters to the stored procedure. Output parameters are supported which can populate values in the spreadsheet but they are not included in this example.
- Validation: The example code includes an example of validating the input for the @CompanyName parameter. It limits the search text to 40 characters and will raise an error if the length is beyond. The custom error shown has a prefix Usernotice:,which is a keyword that tells Interject to provide a message box with the text to the user as a response. Without this prefix, Interject will interpret the error as a generic error.

- Select Statements: Returning data to Interject simply uses a select statement as shown below. More than one can be returned at a time to reduce the connections needed to fully populate a complex report. You only have one select statement in this example.
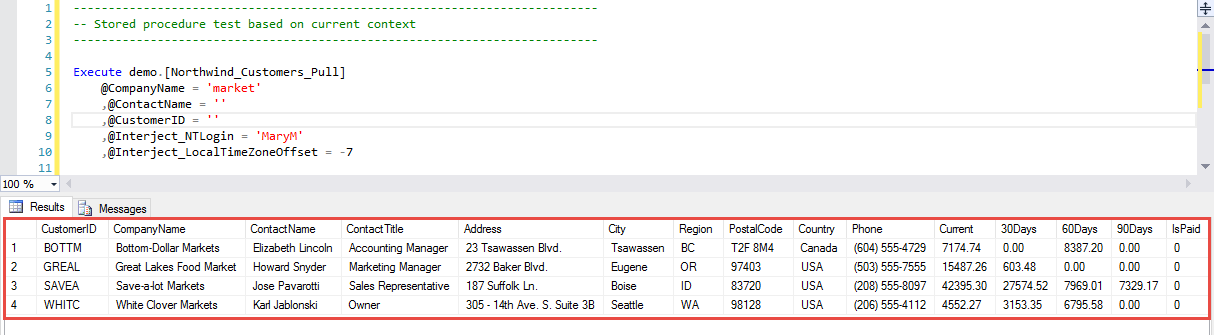
Step 3: It is important to test the stored procedure in the database before testing through the Interject platform. The following example code is a SQL statement that can be executed in a new query. Be sure to change the procedure name to match your own.
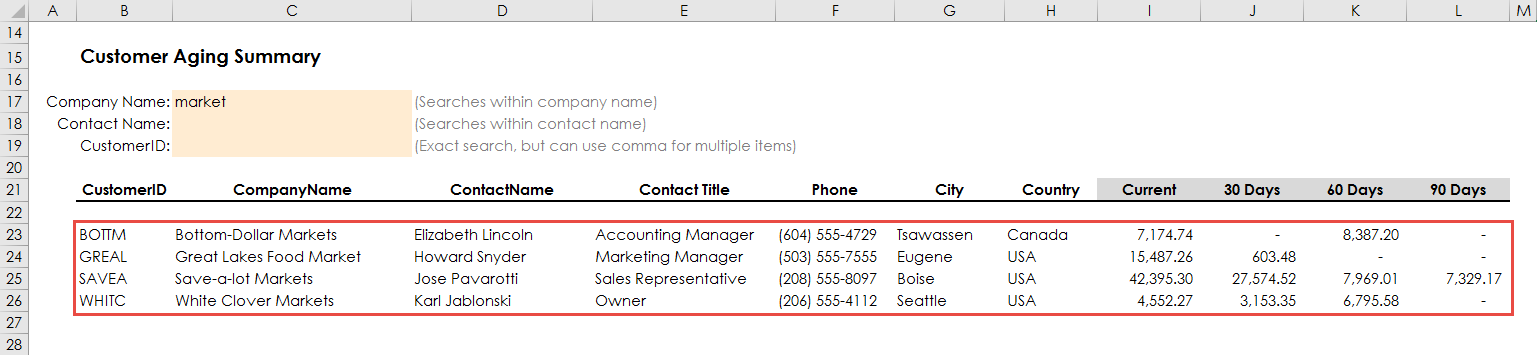
Execute demo.[Northwind_Customers_Pull_MyName]
	@CompanyName = 'market'
	,@ContactName = ''
	,@CustomerID = ''
	,@Interject_NTLogin = 'MaryM'
	,@Interject_LocalTimeZoneOffset = -7
When executed you should see the following result set.
Create the Report
At this point you have a tested stored procedure that uses parameters to filter the results. An Interject Data Connection has been set up to go to your example database and you added an Interject Data Portal to use that connection. In addition, this Portal is mapped to the stored procedure that was just created. Now you are ready to build the spreadsheet report.
Fortunately, the documentation to build this report has already been presented in Create: Customer Aging and you likely have already completed it. However, it is recommended to refamiliarize yourself with setting up this report again to reinforce the process. Just be sure to use your own Data Portal that you just set up for the report.
The end result should look like the screenshot below.
Now that this Data Pull has been completed, please continue to the next example.