Create: Protecting Sheets
Estimated reading time: 11 minutesOverview
Excel provides a way to protect sheets to prevent accidentally or deliberately changing, moving, or deleting data in a worksheet. You can mark the cells you want unlocked so that when you protect the sheet, those cells will be unlocked. Finally, Excel requires a password to protect/unprotect the sheet.
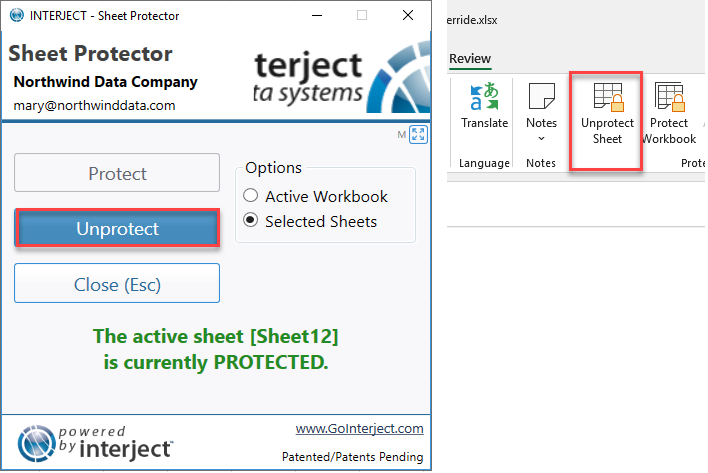
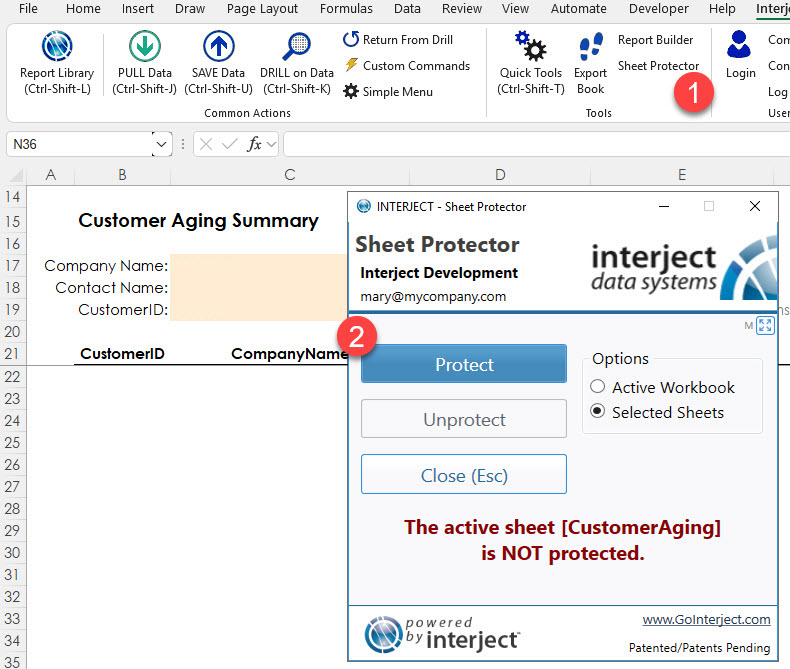
Interject provides a more convenient way to protect a sheet with the Sheet Protector. The Sheet Protector eliminates the need for a password. Interject uses a default password that is internally managed by the use of Interject roles. With the appropriate role, a user does not need to know the protect password and can easily protect/unprotect the sheet. When a sheet is protected using the Sheet Protector window, it will first attempt to use the current password. If that attempt fails it will try any previous passwords that are on file. If those do not work, it will also attempt to use a blank password.
Protecting the sheet still allows for pulls, drills, and many other types of Interject formulas and features. A crucial part of Interject is to still allow users to utilize the input fields built into reports. Protecting the sheet with Interject allows for user inputs to remain unlocked regardless of the user's role.
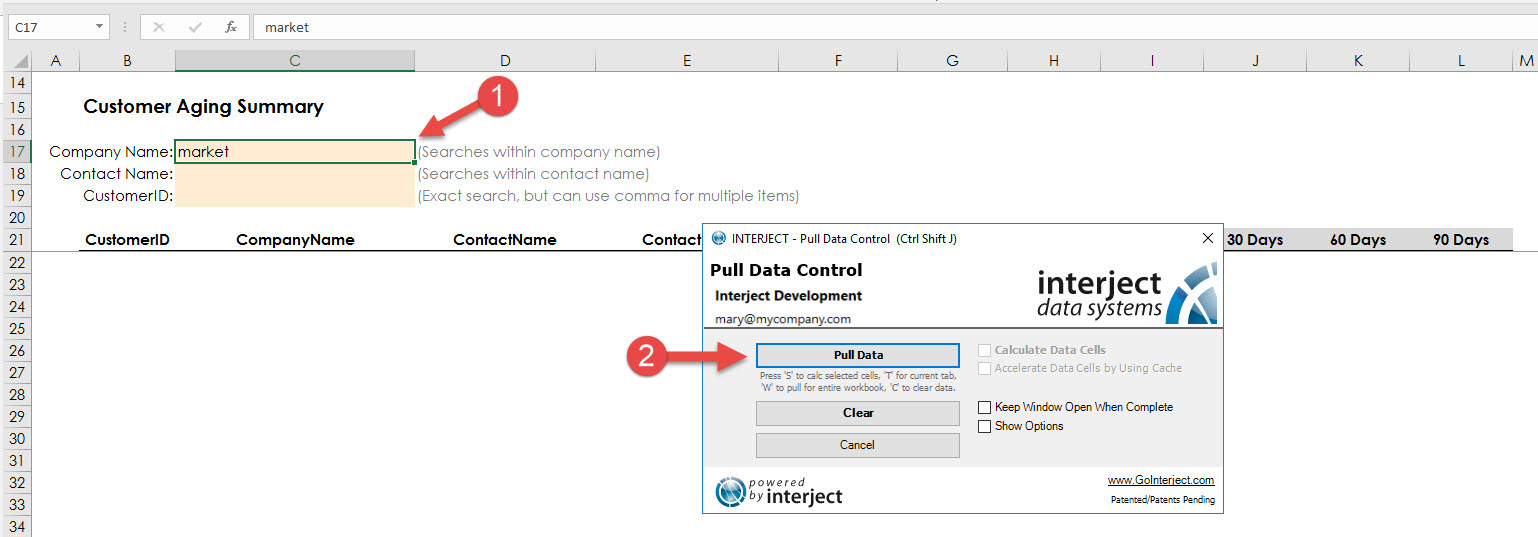
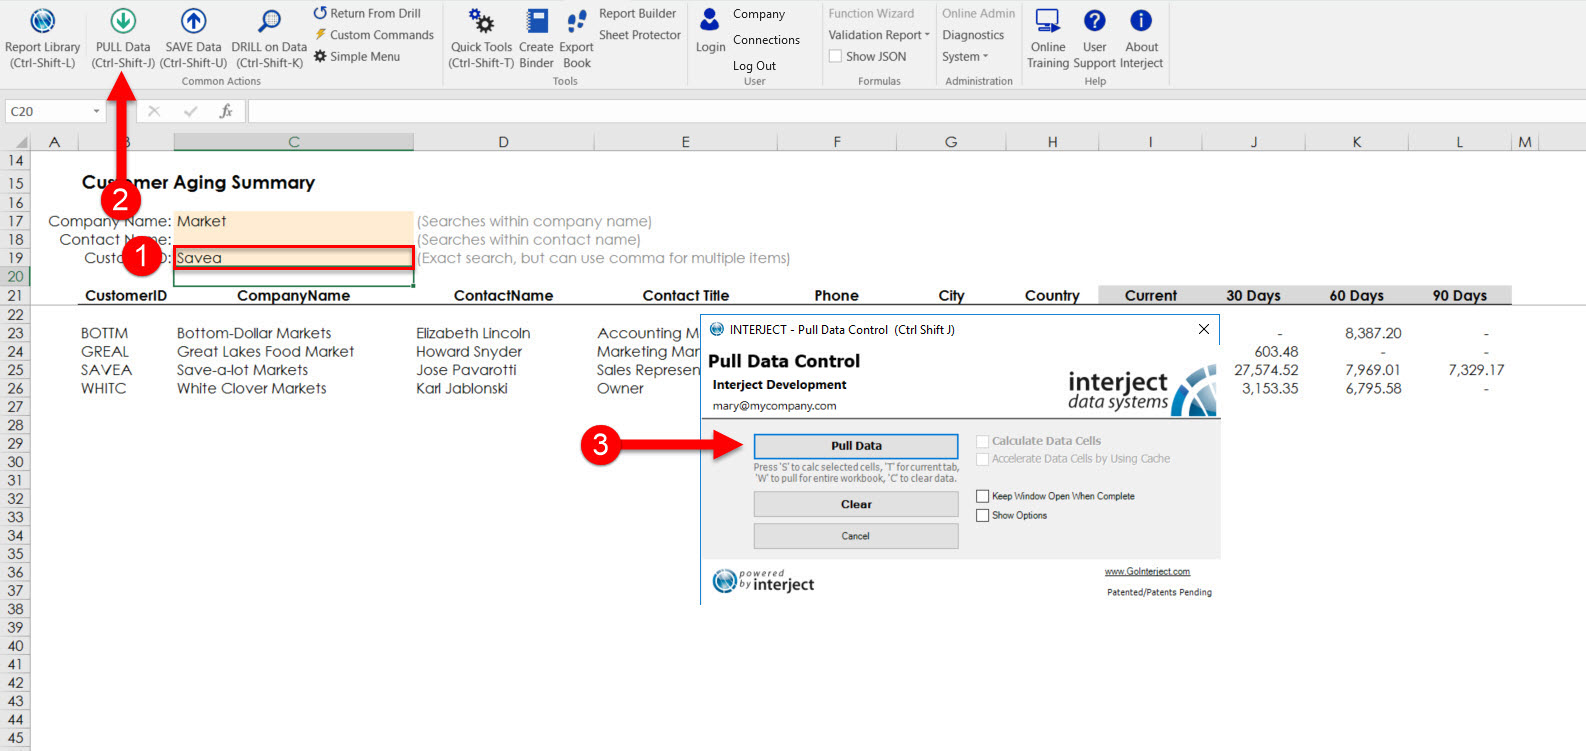
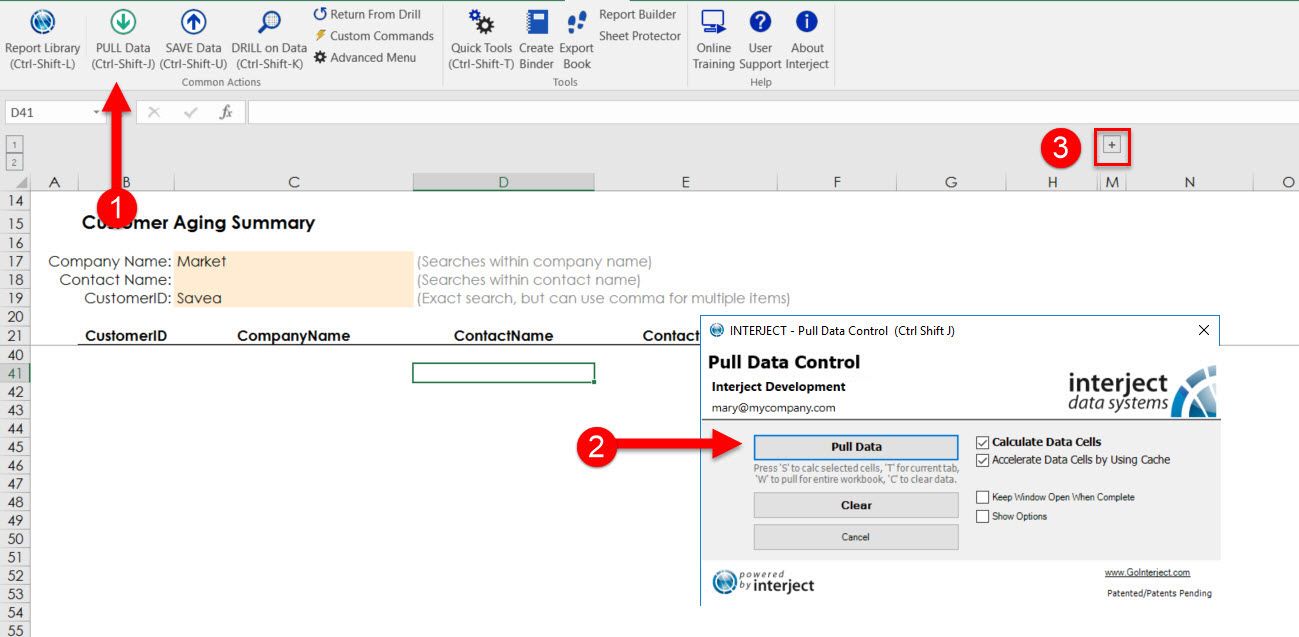
In the following example, you will protect a sheet and use the Interject pull to illustrate how protected sheets continues to function properly. In this example you use the Customer Aging report.
If you are following the Training Labs, this report file can be found in the Report Library at Training Labs > Lab 6 Special Features > Lab 6.2 Protecting Sheets.
Interject Sheet Protector Roles
In order to use Interject's Sheet Protector feature, you must have an appropriate role, otherwise you will get an error showing you are unable:
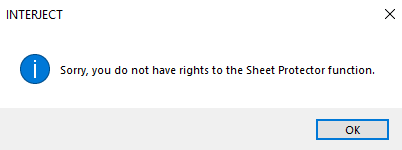
The following roles allow the use of the Sheet Protector:
- ClientAdmin
- SysAdmin
- Protector
Unlocking Cells
In order to allow certain cells to be unlocked when protecting a sheet, you must uncheck the "Locked" field before you protect the sheet. Doing so will allow you to edit these cells even though the sheet is protected.
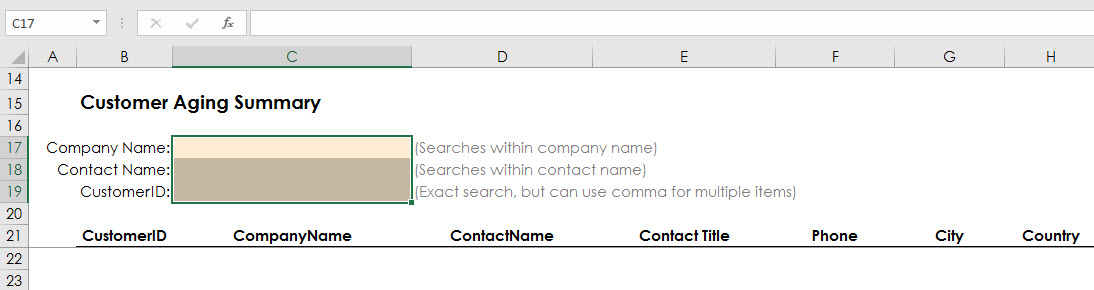
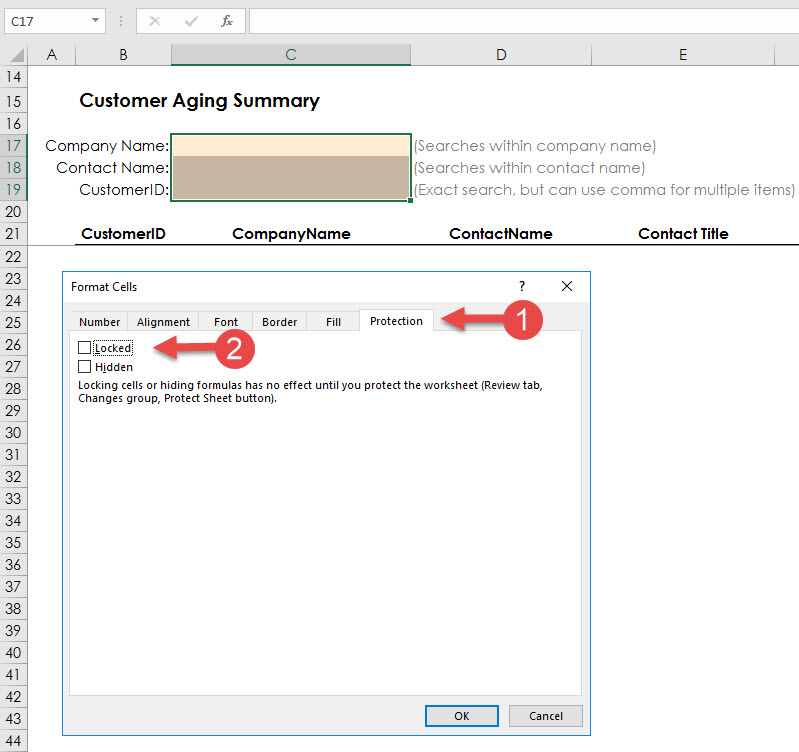
One way of doing this is to first select cells C17, C18, C19.
Right click and select Format Cells.
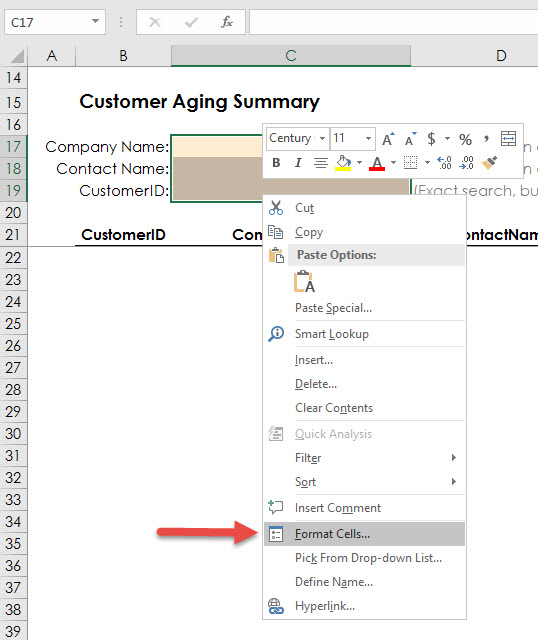
A new window will pop up. Select Protection and uncheck Locked then click OK.
Another way to leave filter cells unprotected is to use the Allow Users to Edit Range tool in the Review ribbon in Excel.
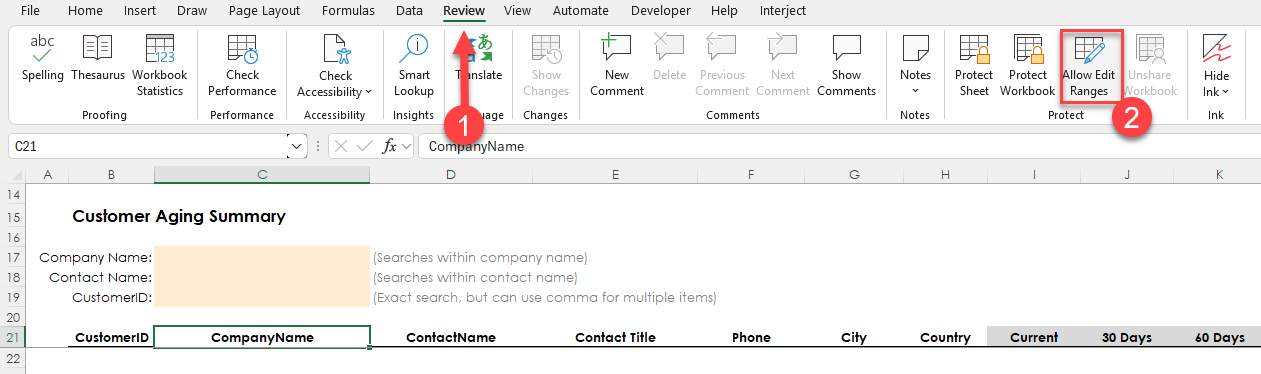
A window will appear, select New.
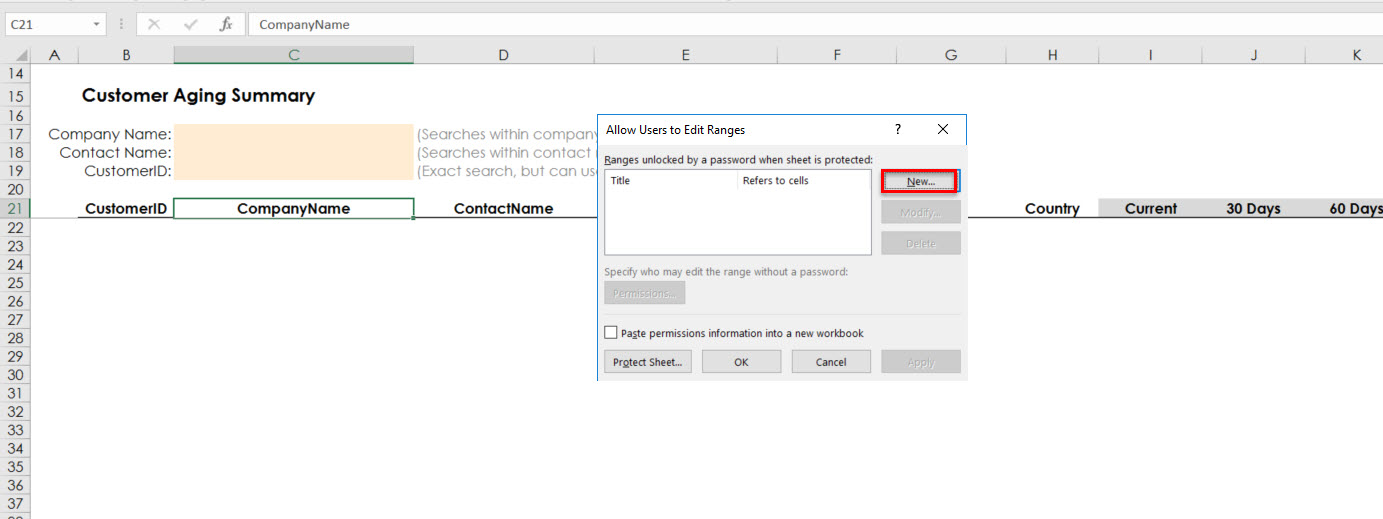
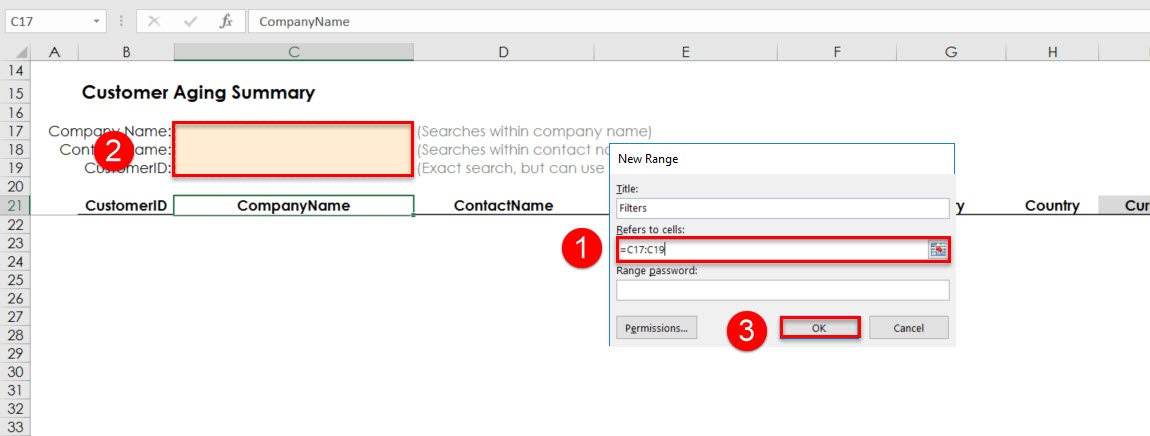
In the title field, type Filters then in the Refers to cells field, select cells C17, C18, C19 then click Ok then Apply.
Note: If the password field is left empty for the named range then anyone can use the filters for the report but they cannot change the data outside of the filter range.
Protecting the Sheet and Pulling Data
Interject's Sheet Protection tool has three options, Unprotect, Protect, and Cancel.
- Protect has additional options, which includes choosing to protect the current sheet or the whole workbook.
- Unprotect will unprotect the current spreadsheet if the user has the correct role within our company.
- Cancel will close Interject's Sheet Protection tool.
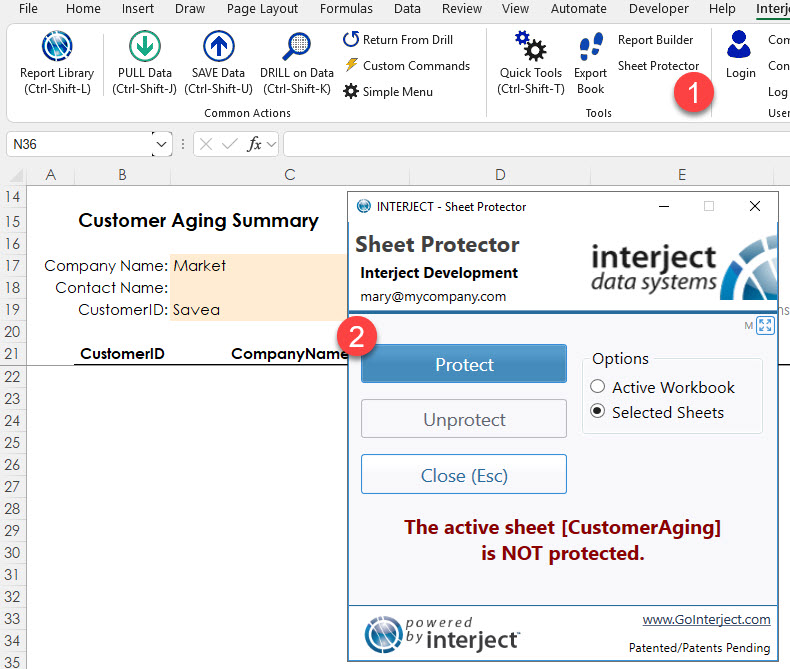
Navigate to the Interject Ribbon and select Sheet Protector then select Protect.
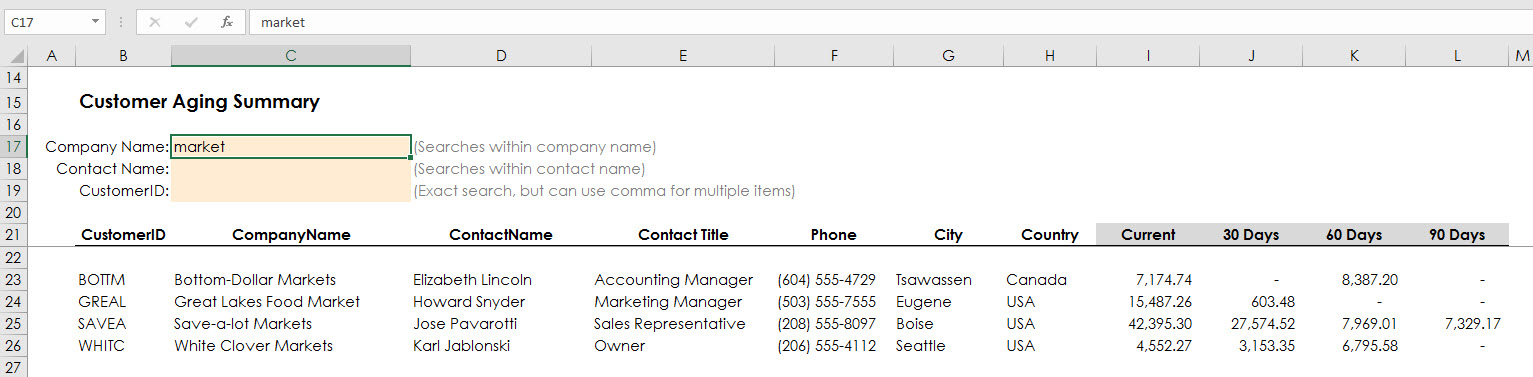
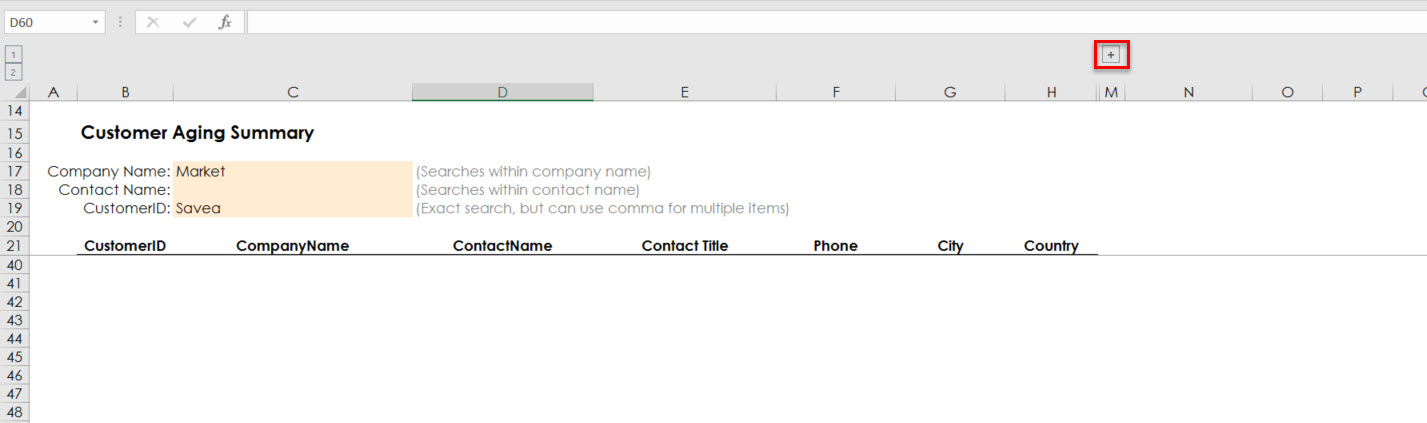
To verify that the filter cells are not locked, input Market into the Company Name parameter then pull the report.
The speadsheet should look like this after.
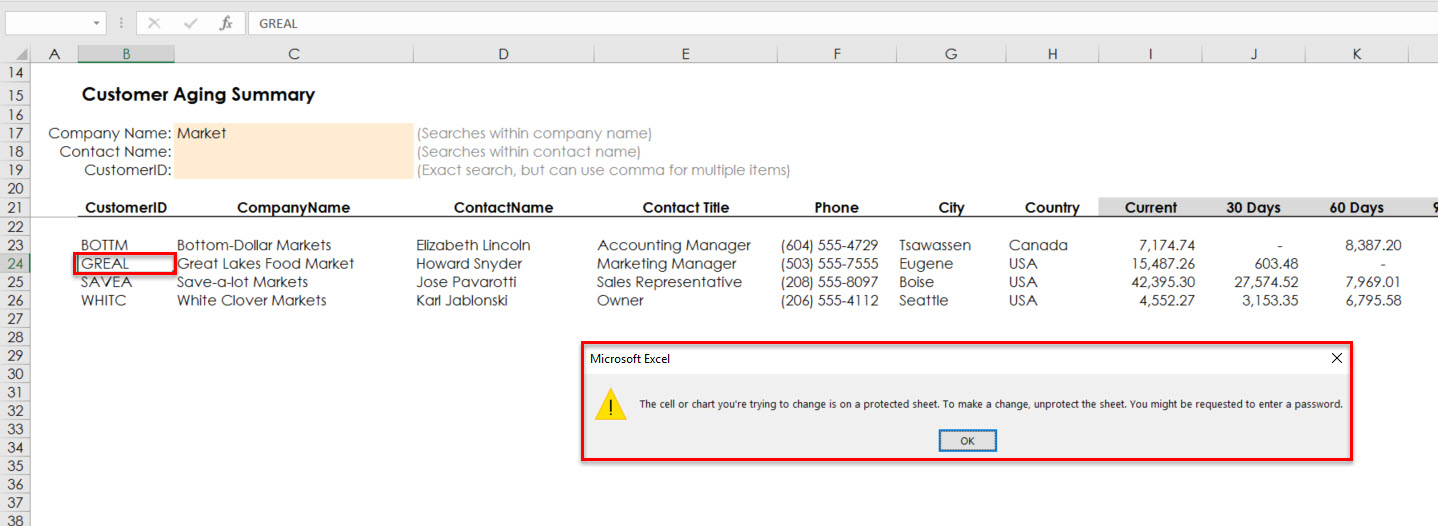
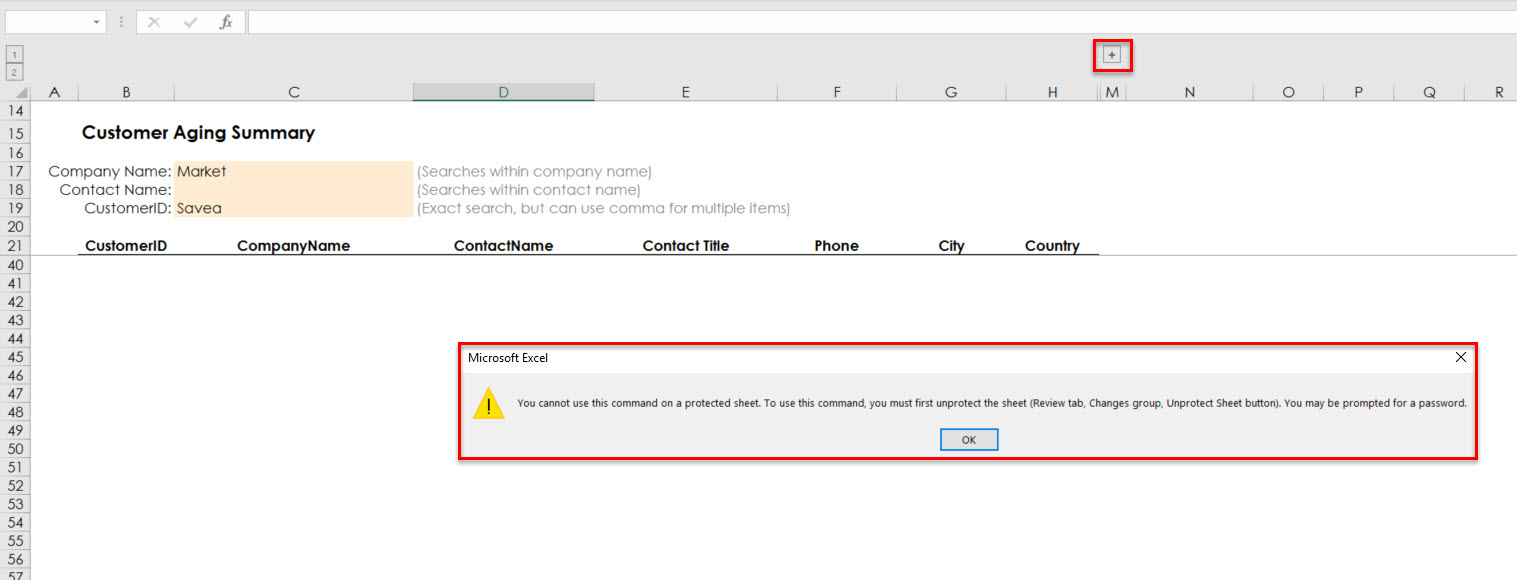
Now if someone were to try and alter your data, for instance, changing the CustomerID of one of your records, they cannot since they do not have your user role.
Now in cell C19 input SAVEA to verify that the input filters are not protected and pull the report.
Protecting Multiple Sheets
First ensure the sheet is unprotected. Then setup a grouping for columns I:L by selecting the columns, then navigating to the Data Ribbon and select Group.
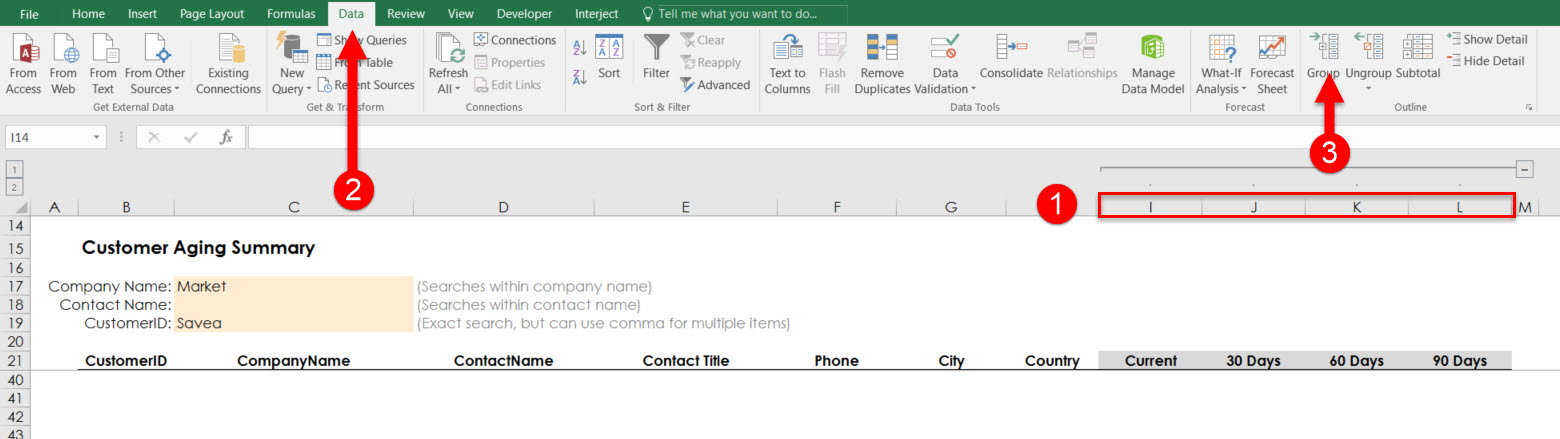
Now, hold down the shift key and select CustomerAccountDetail to select five different sheets.
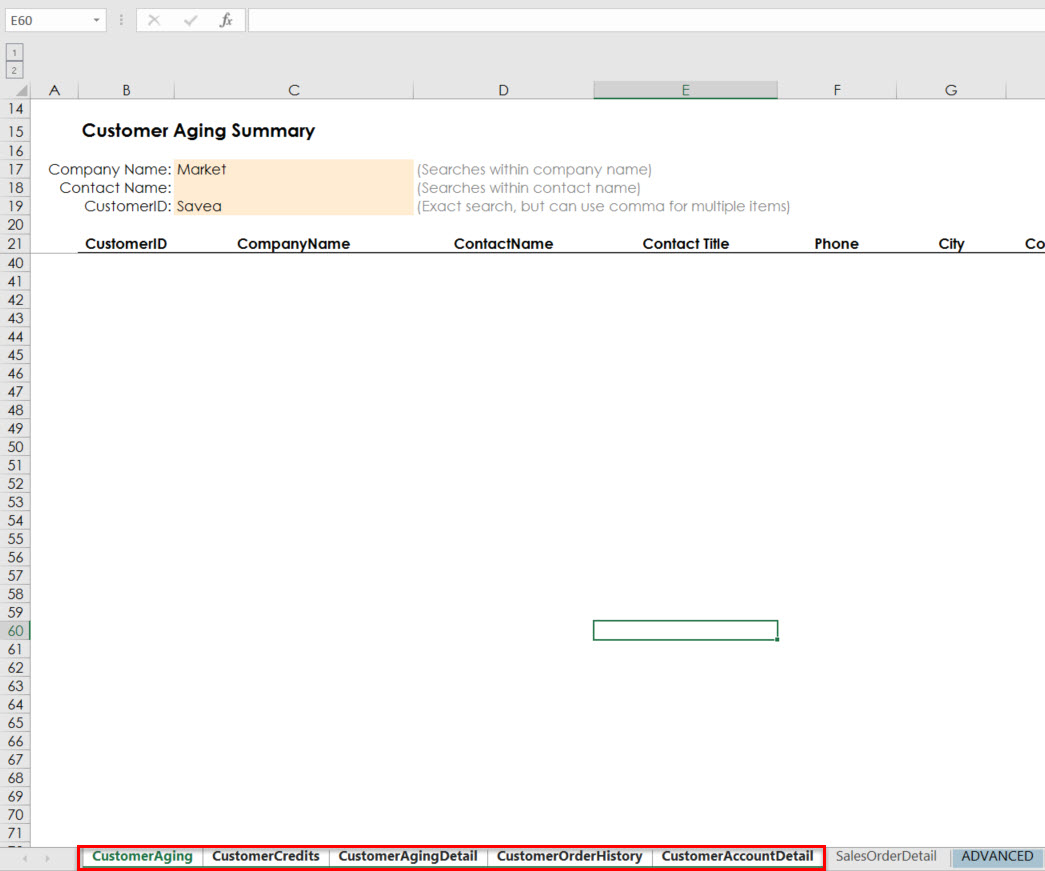
With these tabs selected, navigate back to the Interject ribbon and protect the sheet. This will protect all five of the sheets but leave sheets that were not selected alone.
Special Consideration for Column Groupings
The Interject Sheet Protector also allows for groupings to be expanded and contracted.

Note: Interject leverages the existing sheet protector in native Excel. For this reason, most of the restrictions and rights are the same.
Directly after protecting a sheet, groupings are still operational.
However, closing and reopening a protected sheet with groupings in it will render the groupings locked. If you select the grouping toggle then it will be protected.
There are two ways to fix this.
Option 1:
Pulling the report will refresh the protection settings. One of the settings that are refreshed is the protection of groupings. After a pull, groupings are unlocked while the rest of the report is still locked.
Option 2:
The other way is to navigate to the Interject Ribbon and click on the Advanced Menu to enter the advanced menu.
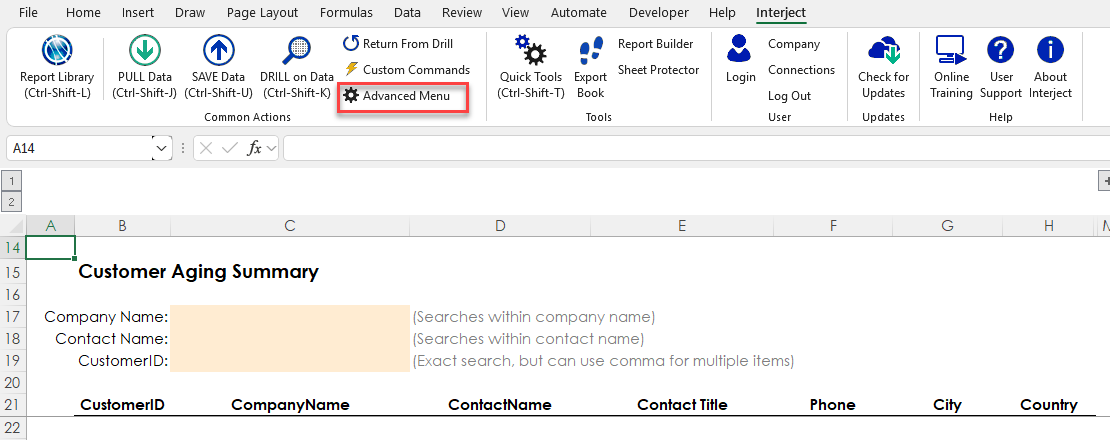
Select the system dropdown and click Re-enable Protecting Groupings.
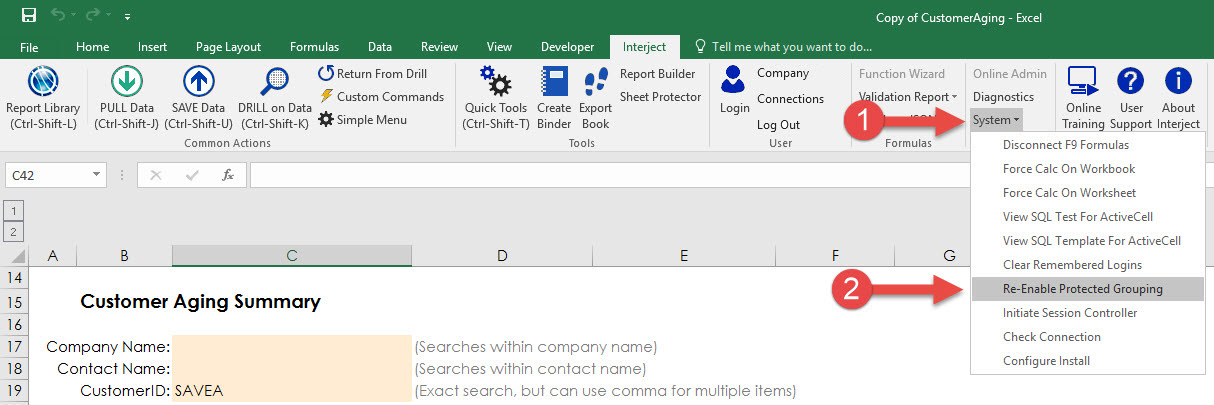
Now, the sheet is still protected but groupings can function as normal.
Working With Excel's Protect Sheet Manager
Excel has a Protect Sheet Manager that allows you to customize which functions the user can execute when the sheet is protected. Click the Review tab and then Protect Sheet:
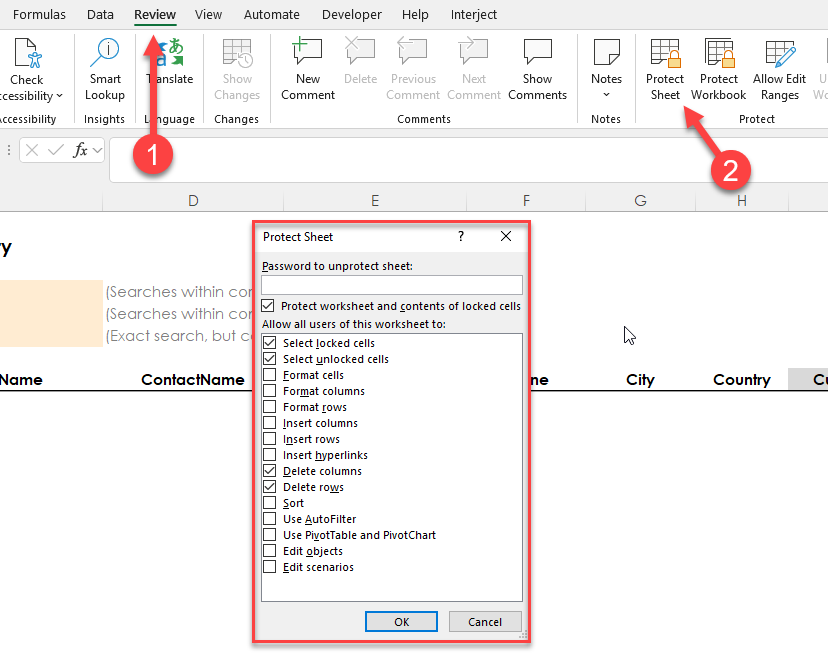
In order to utilize the functionality of Excel's Protect Sheet Manger with Interject's Sheet Protector, be sure to leave the password blank before clicking OK:
![]()
Note: If you enter a password, you will be unable to use Interject's Sheet Protector.
Interject will now use the current permissions you set up when protecting the sheet.
If you want to change these settings, you must first unlock the sheet. You can Interject's Sheet Protector or Excel's to do this.