Export: Basic Distribution
Estimated reading time: 13 minutesOverview
The distribution process provides extensive control when creating and distributing reports. You can create one or more report workbooks and choose which worksheet tabs to include, create copies by iterating through different filters, and choose export targets like File Location, Email, Print, PDF, etc.
If you are following the Training Labs, this report file can be found in the Report Library at Training Labs > Lab 7 Exporting Data > Lab 7.2 Basic Distribution. Note: The Report Library at Training Labs for this lab will be blank.
Create a Distribution From an Existing Report
Step 1: First you are going to open a report. The example for this walkthrough will use the same PL Trend Report seen in the Financial walkthrough example.
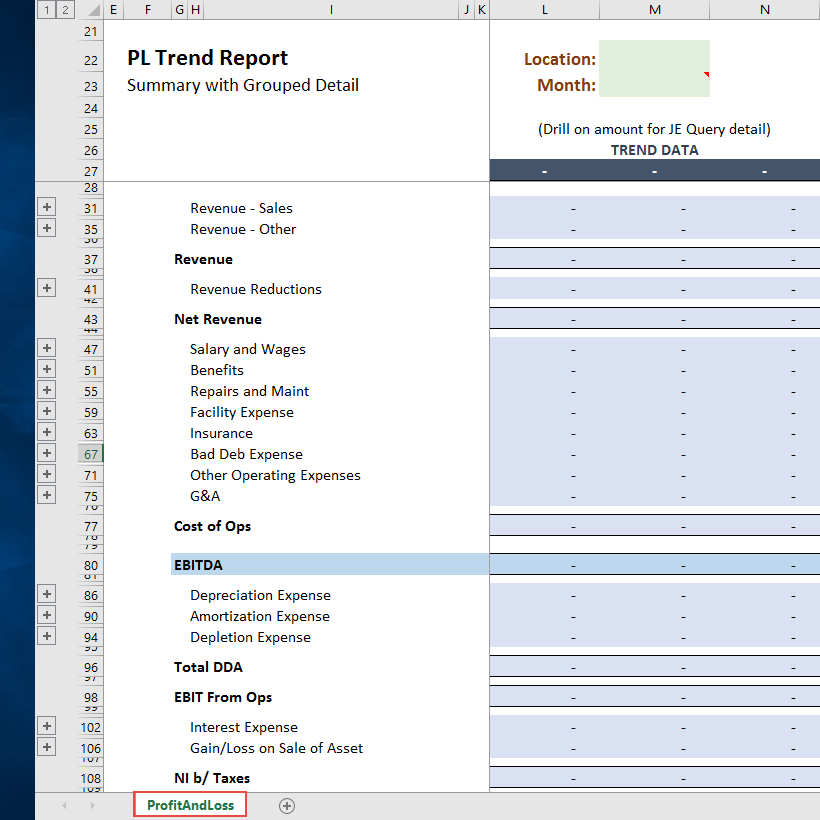
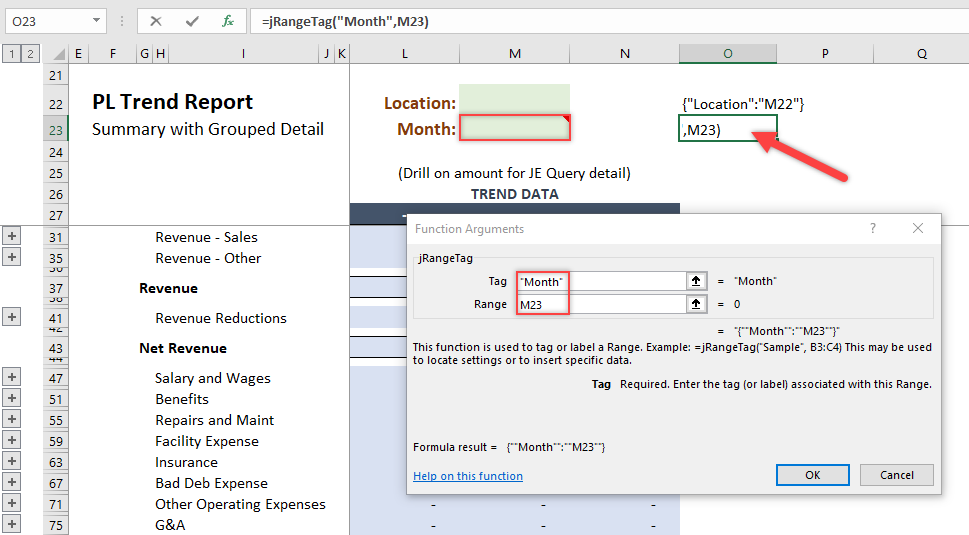
Step 2: When creating a distribution, you are normally taking a worksheet and making a copy for different cost centers. To accomplish this, you need to mark which filter will change for each copy. Do this by adding a Range Tag formula. Type =jRangeTag() into cell O22 and hit the fx button. It does not matter where you place this formula since it will be removed automatically as the worksheet is used to create the distribution.
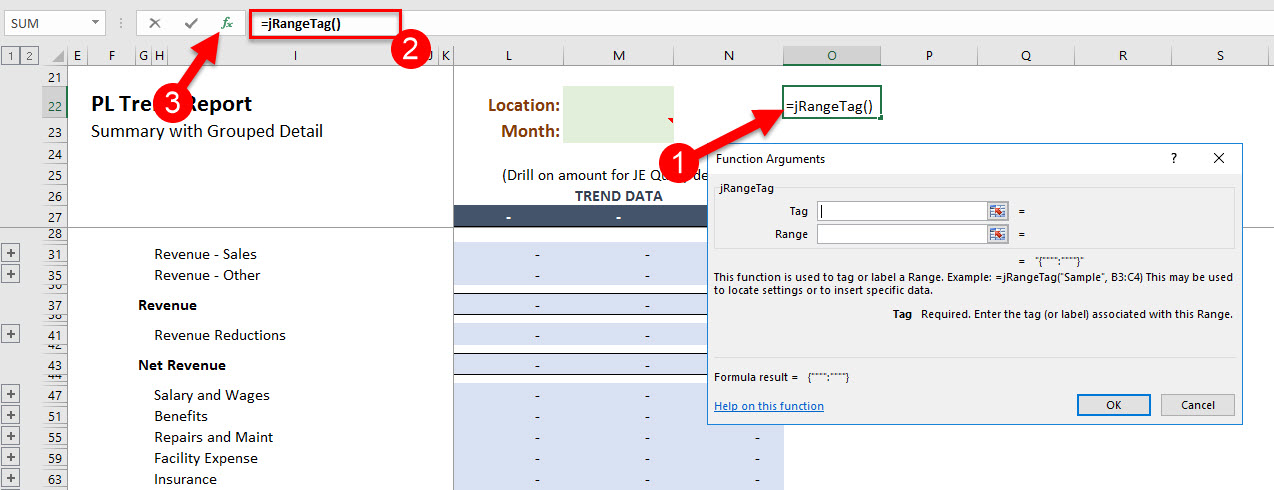
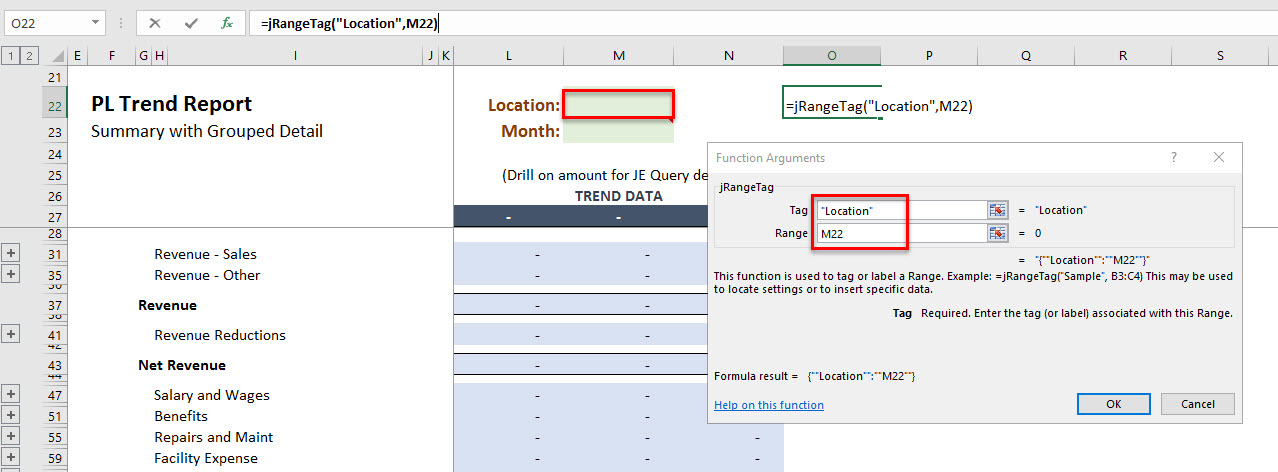
Step 3: The Function Wizard will open. You want to change the Location filter for each worksheet copy, so type Location in the Tag argument. For the Range argument, select cell M22, the Location filter, as shown below.
Step 4: You need to add a Range Tag for the month as well. In cell O27, type another jRangeTag() formula and click the fx button.
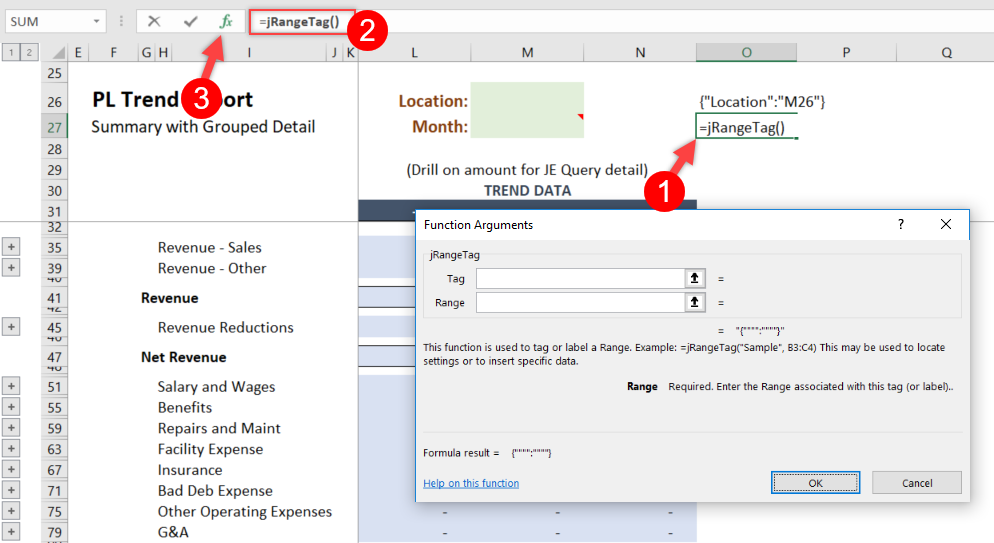
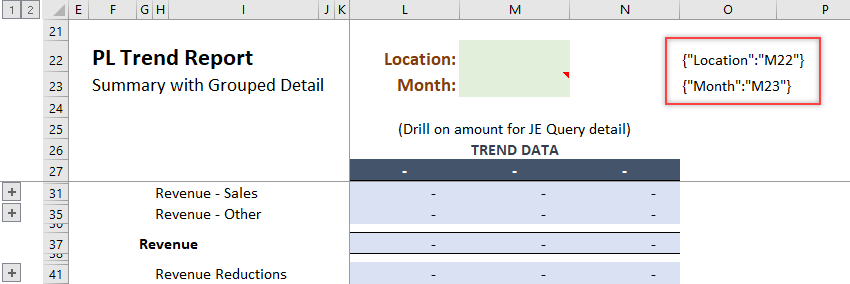
Step 5: With the Function Wizard window open, enter Month for the Tag argument and M23 into the Range argument. This will allow us to change the month within the distribution setup.
Once this is completed, the Range Tag formulas should summarize what was setup as seen in the screenshot below.
Step 6: Now it is time to create the Distribution worksheet that generates the distribution. You can create this by using the Export Book menu item in the Interject ribbon. The Export and Distribution window will appear and click Create Distribution Sheet.

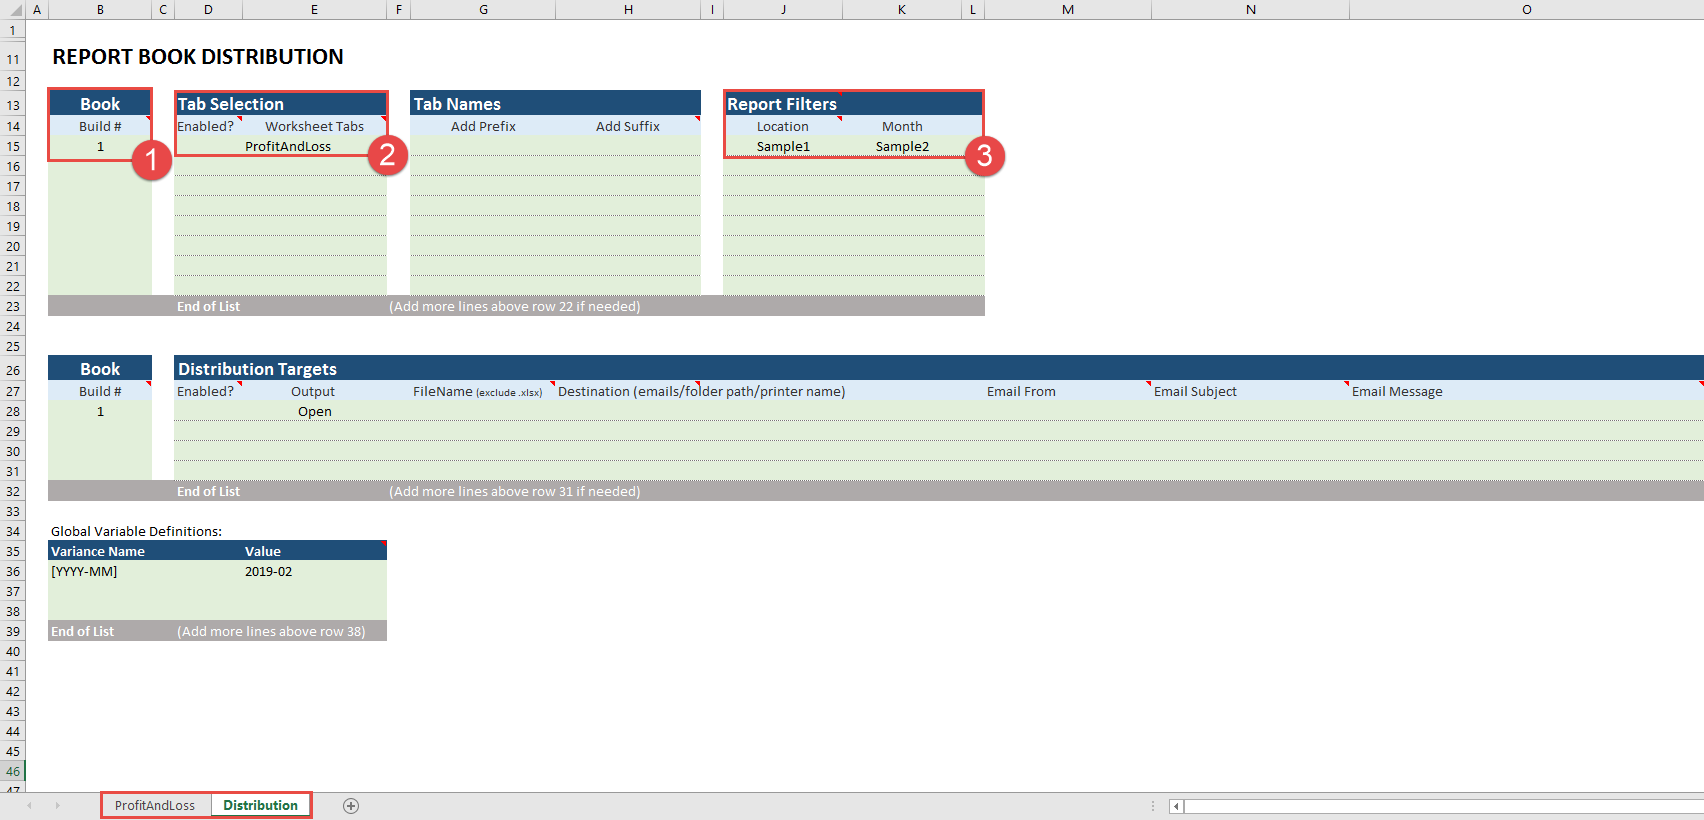
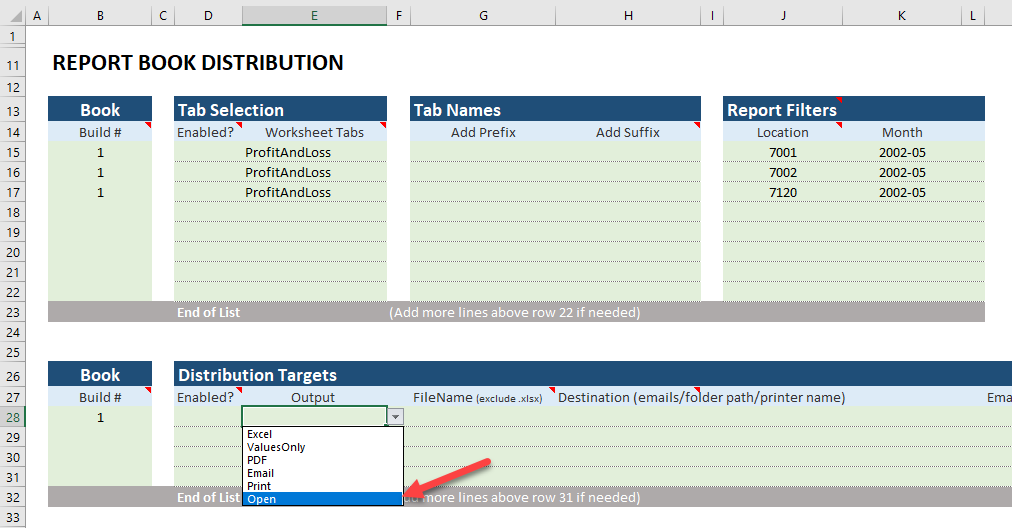
Interject will create the Distribution worksheet in the existing workbook and will search for existing Range Tag formulas in the workbook. The screenshot below illustrates the typical defaults that will be used when initially created.
- The Book column should default to 1, noting the first workbook build to be created. More can be added if needed to the same distribution sheet.
- The worksheet names for those that have Range Tag formulas should be added to the Tab Selection columns by default.
- A filter is created for each jRangeTag found in the workbook in the Report Filters columns.
Note: The Enabled? column contains a drop down list of options that can be applied to the tabs, on an individual basis, which are being created.
- Blank - When the enabled column is set to blank, Interject interprets this as a Yes value and automatically pulls the data after the report is created.
- Yes - When this column value is set to Yes then distribution report builder will automatically create the reports And pull the data.
- No - In the instance that the value is set to No, Interject will not build that report tab.
- Prep - When set to Prep the report tabs will be built out, however, the data will not be pulled automatically.
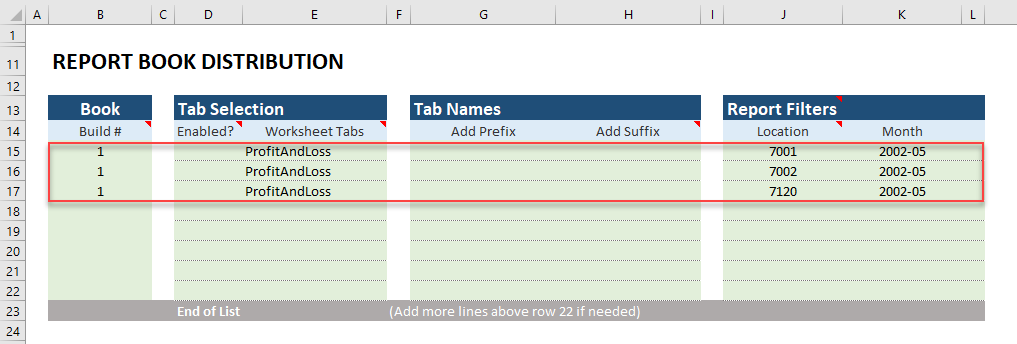
Step 7: Edit the distribution defaults further. In this example, you want to create three copies of the ProfitAndLoss worksheet, one for each location 7001, 7002, and 7120. And you want to use the month 2002-05. Use the screenshot below as a guide, and type in the values for columns Book, Worksheet Tabs, Location, and Month.
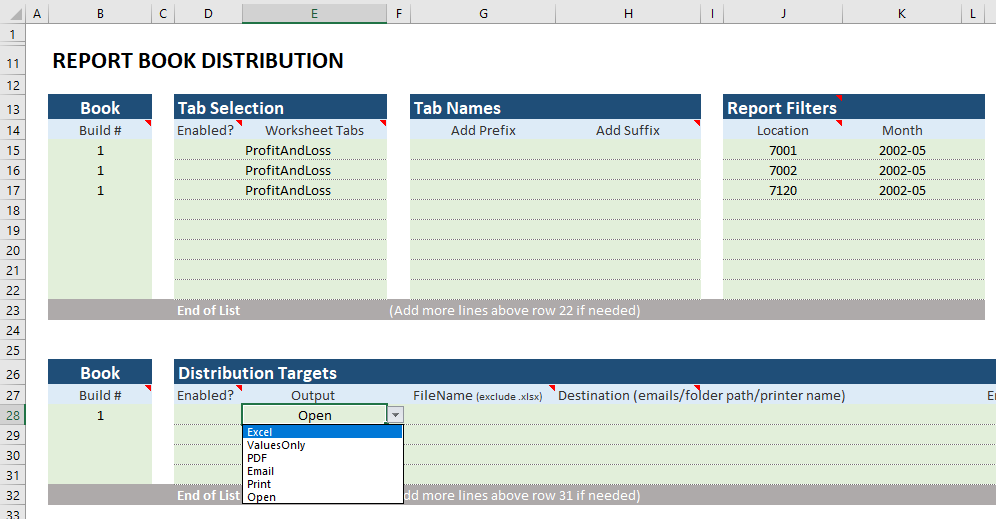
Step 8: You are ready to create a new workbook of reports, but first you need a destination for this distribution. There are many options for the Distribution Target (open, save, print, email, etc.). In this example, you will use the default, Open, which creates a new workbook without saving.
Each output has it's own purpose and use. Each is detailed below.
| Output | Purpose |
|---|---|
| Excel | Saves the Excel file and has the option to rename it. |
| Values Only | Removes DataCell formulas from the report, saves the Excel file, and has options to rename it, open it, and email it. |
| Saves the Excel file as a PDF and has the option to open it immediately, give it a custom name, or email to designated recipients. | |
| Emails the Excel file to designated recipients and has the option to rename it | |
| Prints the Excel file to a designated printer or the default printer. | |
| Open | Opens the Excel file. |
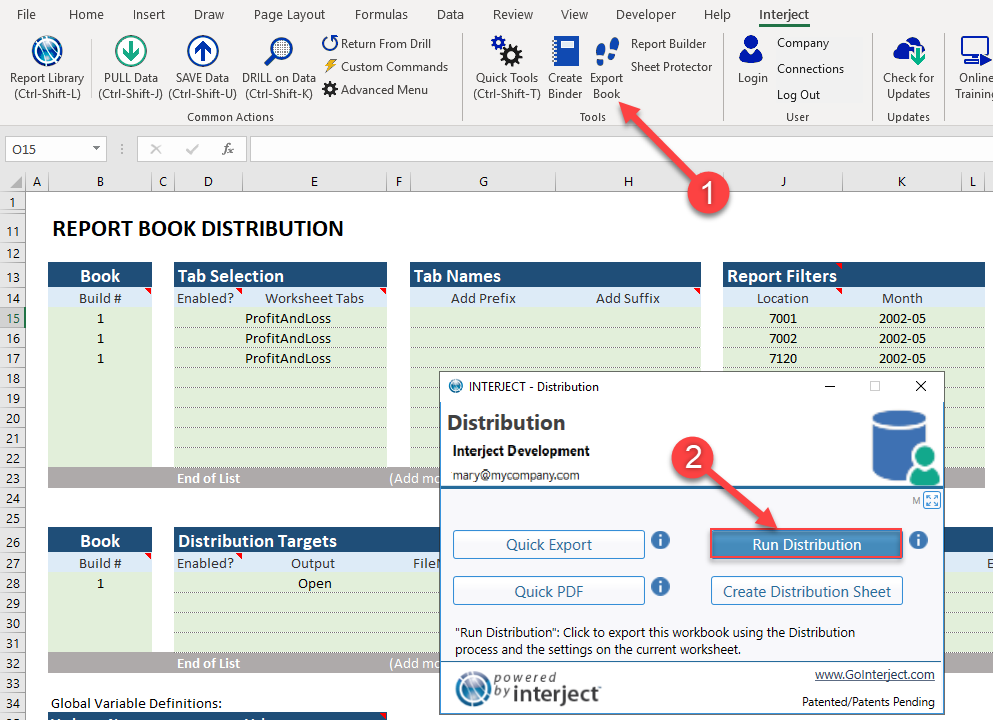
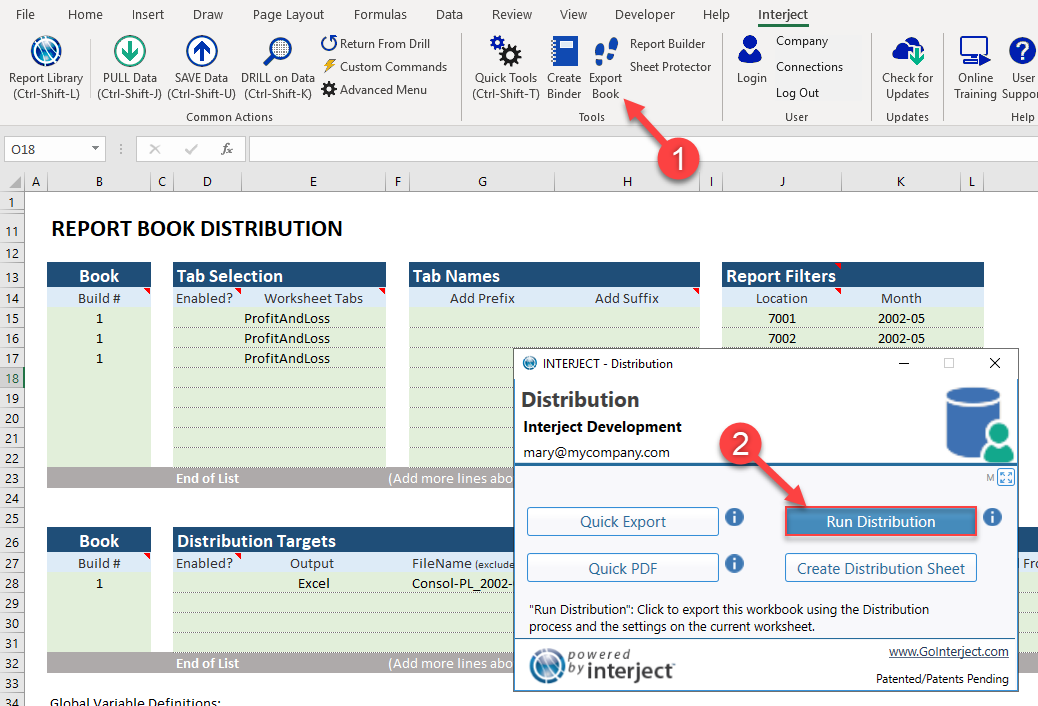
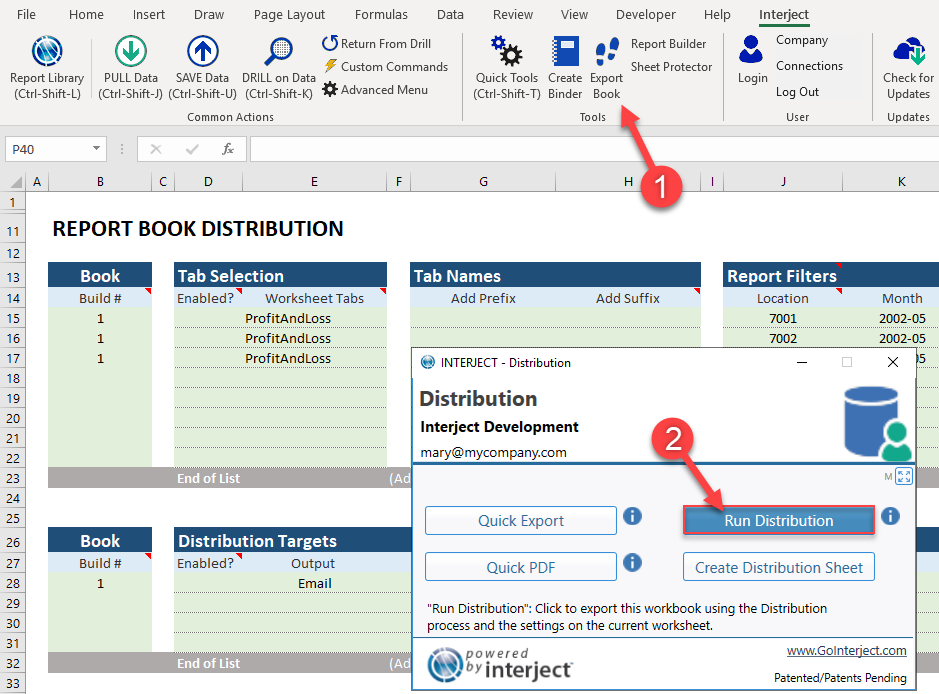
Step 9: To run the distribution, from the Distribution worksheet click the Export Book menu item in the Interject ribbon. Click the Run Distribution button that appears in the next window.
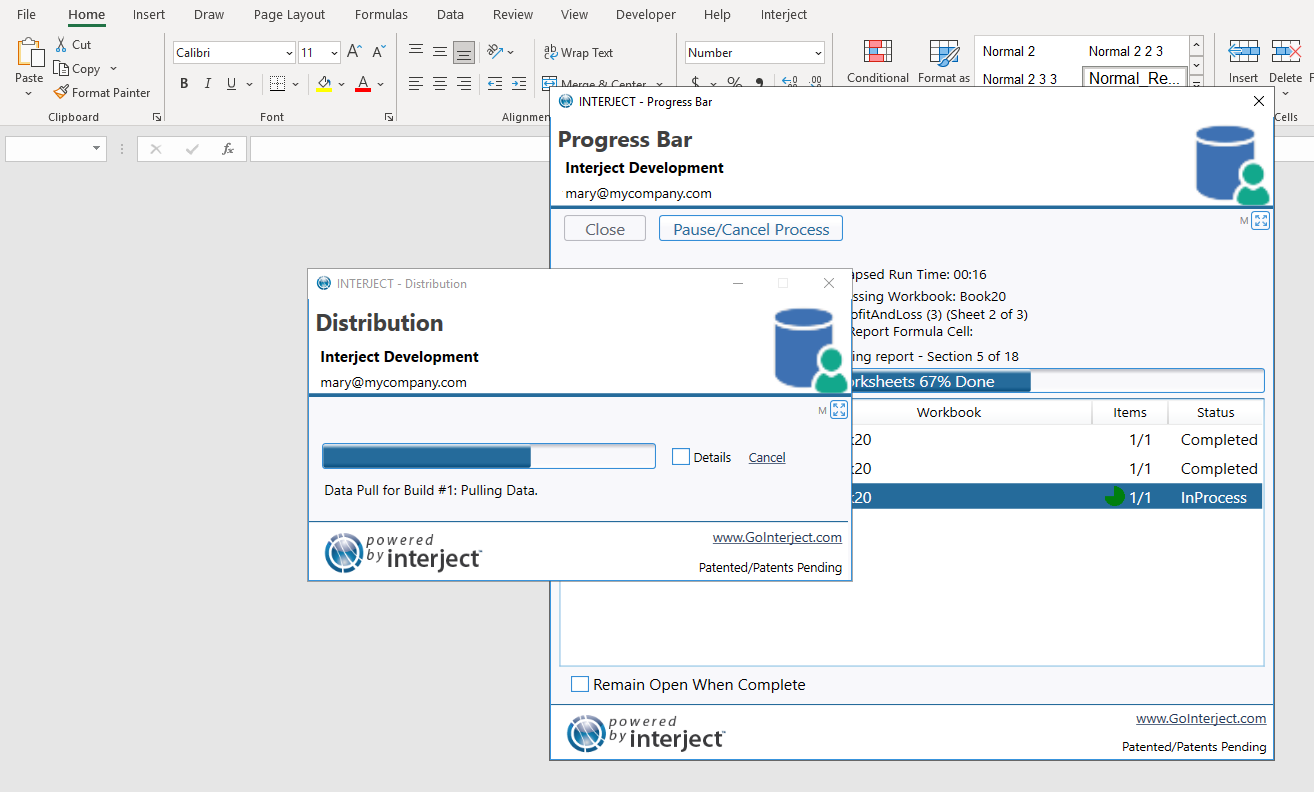
As the distribution process is running, it will display its activity and progress as seen below.
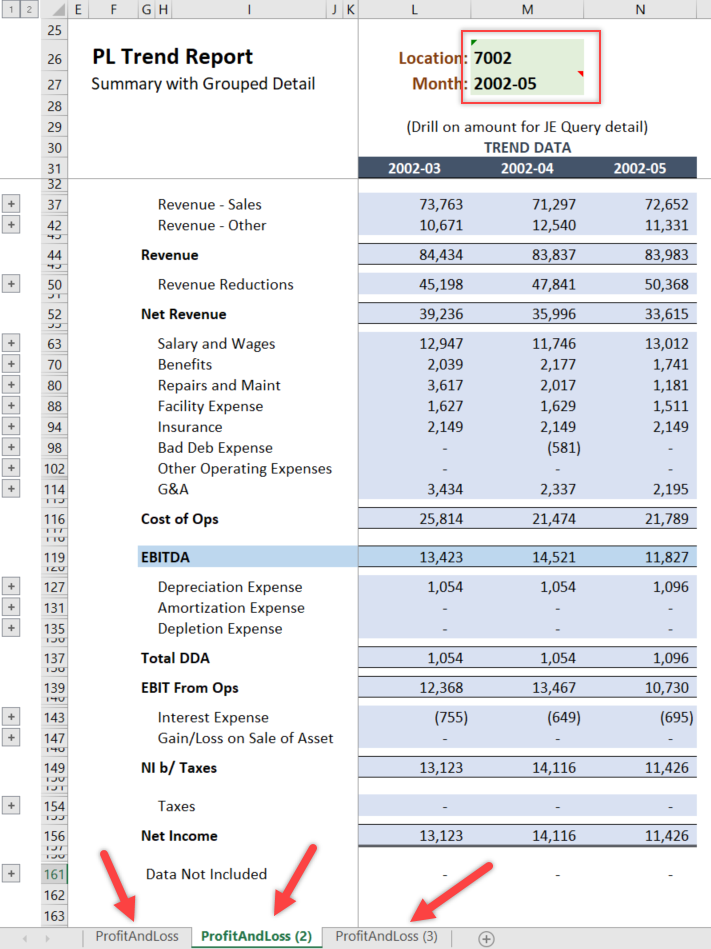
When the process is complete, the new workbook opens and the the original workbook is unchanged. Looking closer at what you created, the workbook below has 3 worksheets, and each worksheet has its own filter values as configured. You will notice that the worksheet names are simply incrementally numbers. You will cover how to custom name each tab in the next section, Advanced Distribution page.
Distributing to a Folder
Now you are going to do the same distribution, but this time you will save to a specific file folder.
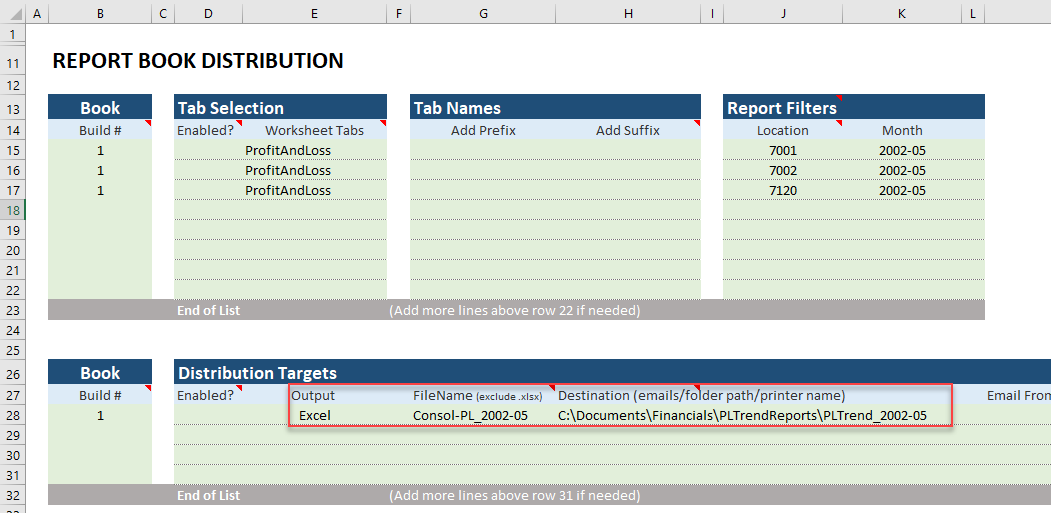
Step 1: To do this, navigate back to the distribution worksheet and change the output to Excel in cell E28.
Step 2: Now you can name the file and select its destination.
Step 3: Now run the distribution.
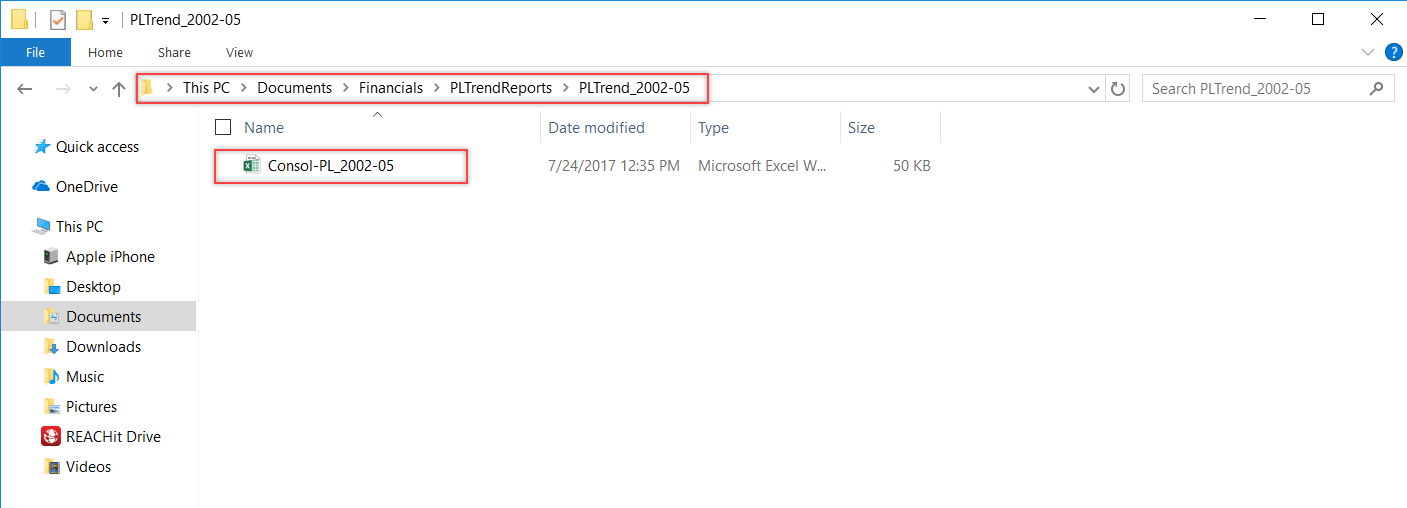
Step 4: After you run the distribution, navigate to its folder to see that the file has been saved correctly.
Distributing With Email
Navigate back to the page to distribute the workbook via email.
Step 1: First, you need to make sure the email is set up properly. The email distribution requires an SMTP server set up in the Interject Portal Website. The Organizational Profile settings area contains the SMTP information that must be completed beforehand.
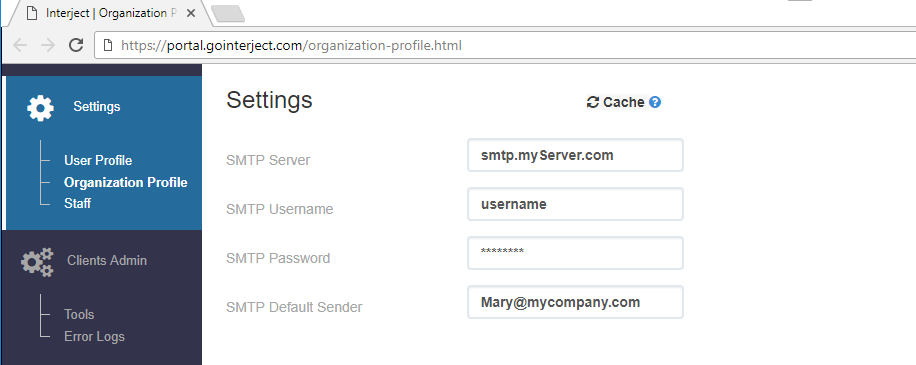
Assuming the SMTP information is entered, continue demonstrating email distribution.
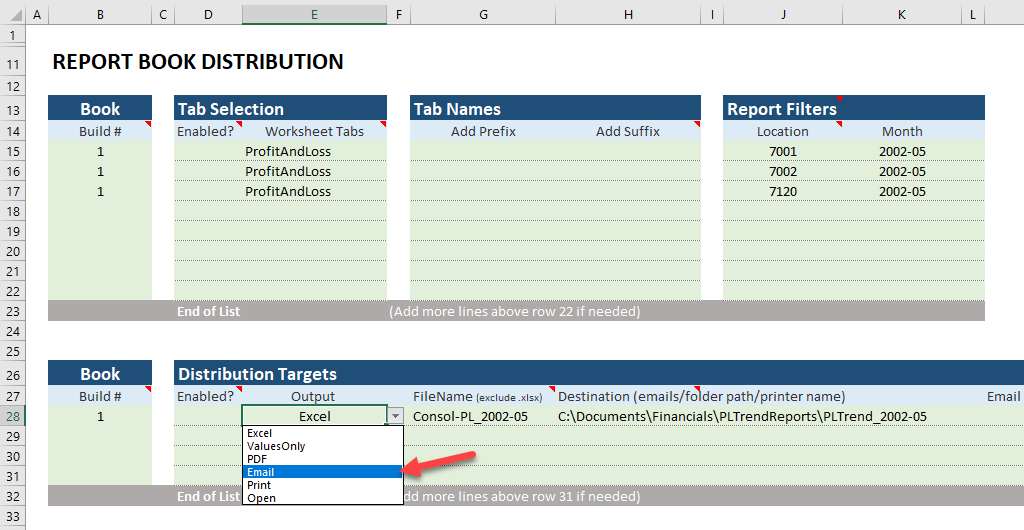
Step 2: In the Distribution Target rows of the Distribution worksheet, click the drop down in the Output column. Choose Email.
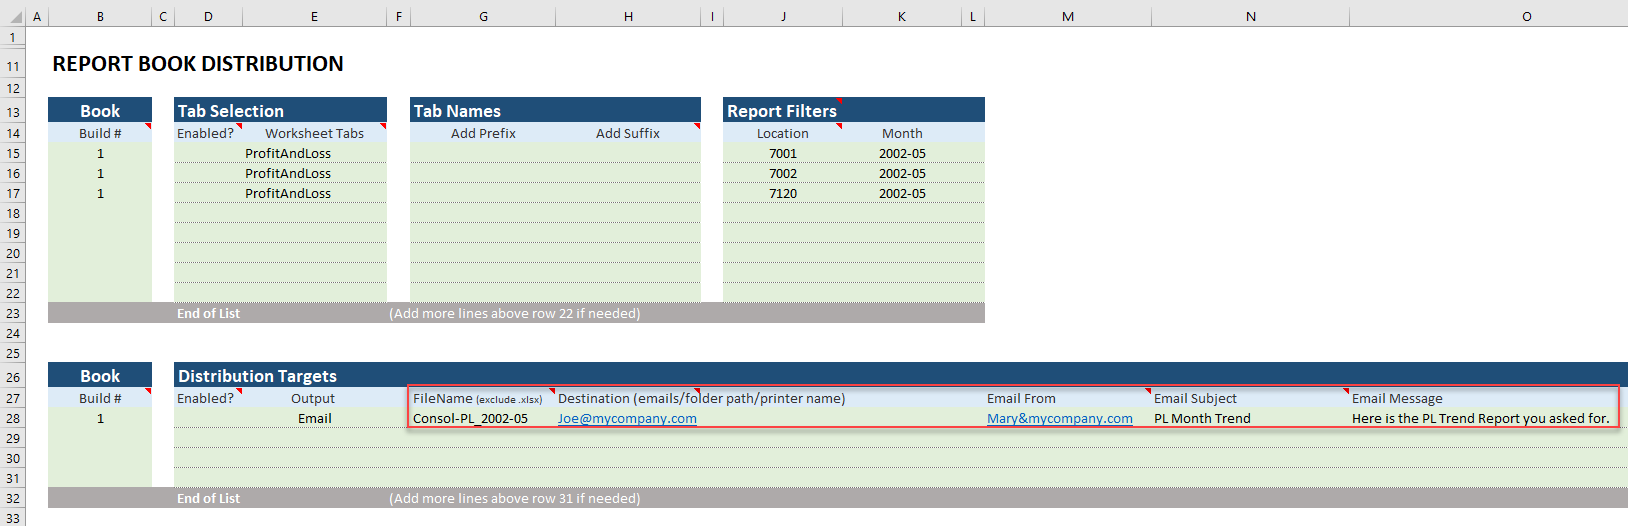
Step 3: Now you can type in where the email is going, where the email is from, the subject, and the email message. You will need to work with your IT department to work through email configuration matters to avoid the delivered email being flagged as spam in your corporate email server. This can occur if the From email is any different than configured earlier with the SMTP settings.
Now run the distribution again and the email will be sent to the destination.
You have completed the basic distribution section. Continue learning about distribution in the Export: Advanced Distribution page.