.NET API Setup
Estimated reading time: 17 minutesOverview
Interject allows data flow from custom sources through a web API. The Interject .Net API is built upon C# and the .Net Framework.
Requirements
- Internet Information Services (IIS) (if hosting with IIS)
- .NET >= 7.0
- .NET SDK (for developing)
Note: If you intend to use this API on Linux or macOS, it is necessary to download Mono, the cross platform open-source development platform based on the .NET Framework.
Get The Code
With Git, you can clone the repository directly to your system. Navigate to the desired directory and run the following command:
git clone https://github.com/GoInterject/ids-dotnet-api.git
Note: If this repo is private and you need access, please contact us. It will be public soon.
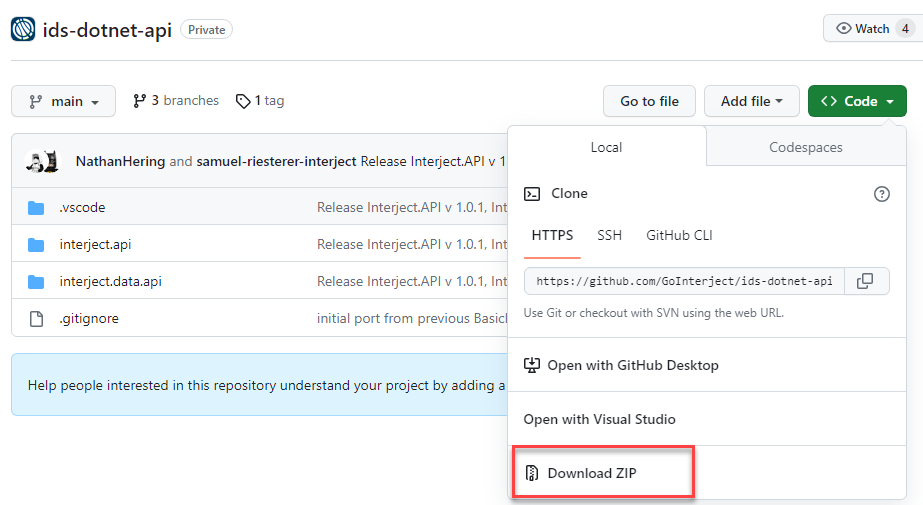
Alternatively you can download the zip file and unpack manually:
The Repo
The repo contains two code bases: the interject.api code and the interject.data.api code. The Interject.Api contains the code relating to the handling of Interject requests, formatting data, and returning responses to the Interject Add-in. This package is available on Nuget, the central package repository. The code base is included in the repo for preview.
The Interject.Data.Api contains the code relating to controllers and endpoints. The Interject.Api package is imported from Nuget into the Interject.Data.Api with the using statement:
using Interject.Api
Getting IIS
Internet Information Services (IIS) for Windows Server is a flexible, secure and manageable Web server for hosting anything on the Web. For most cases, the default roles and features of IIS will suffice. For more information, see Roles, Role Services, and Features.
For detailed information on IIS installation, see here.
Windows
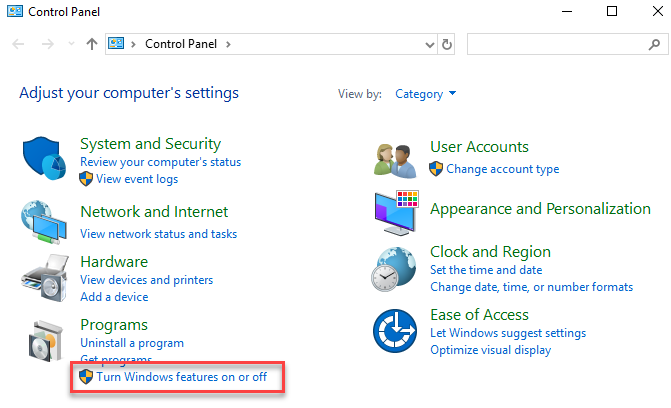
Open the Control Panel and click on Turn Windows features on or off:
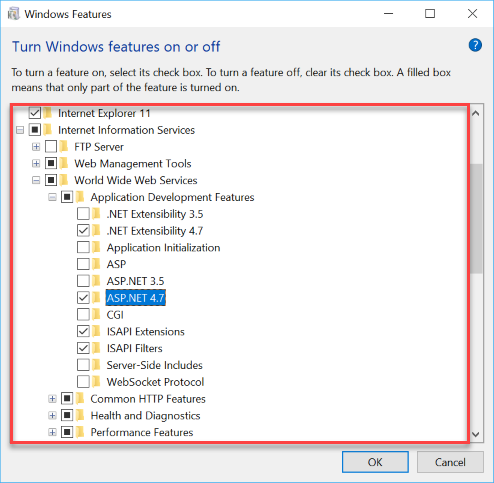
Under IIS, select the components you which to install:
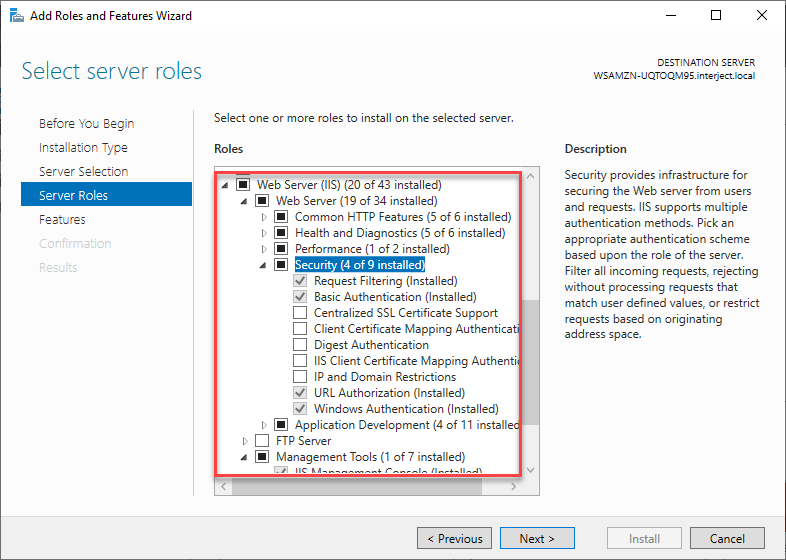
Windows Server Manager
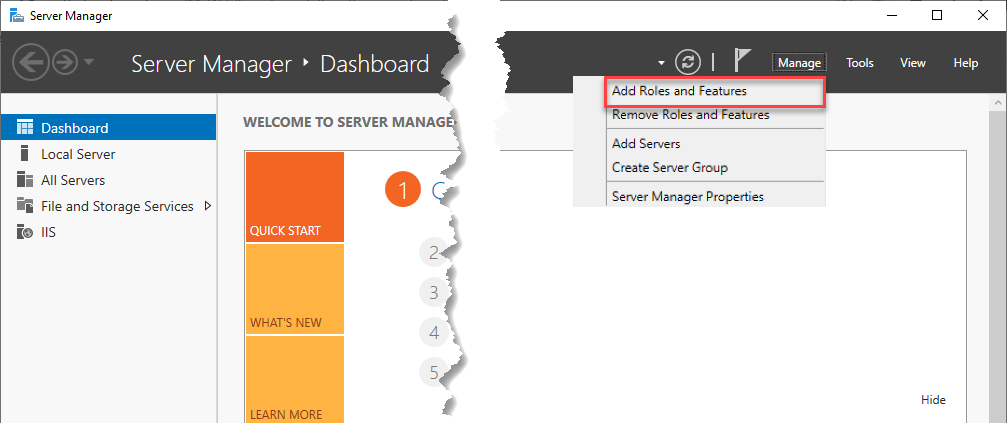
Click Manage and then Add Roles and Features:
Follow the wizard that appears and under "Server Roles", select the Web Server (IIS) components you which to install:
Publishing
Publishing the web API varies depending on your development environment:
Deployment
Determine where you want your Web API files to reside. The default directory for Windows is "inetpub" located on the C drive but any folder will do. It is recommended to use a separate directory for the source rather than the published directory.
For more information, see Host ASP.NET.
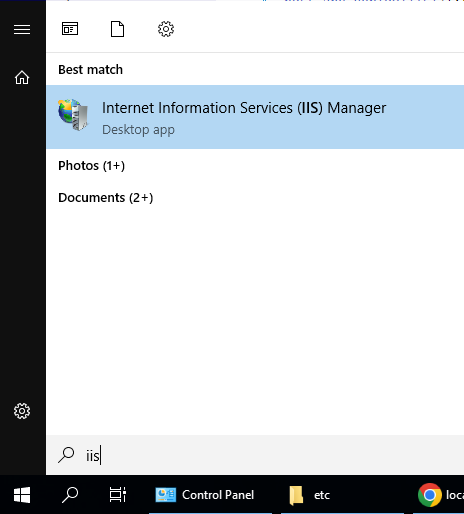
Set Up Website in IIS
Begin by opening up IIS. With Windows, click the Start button and type in "IIS":
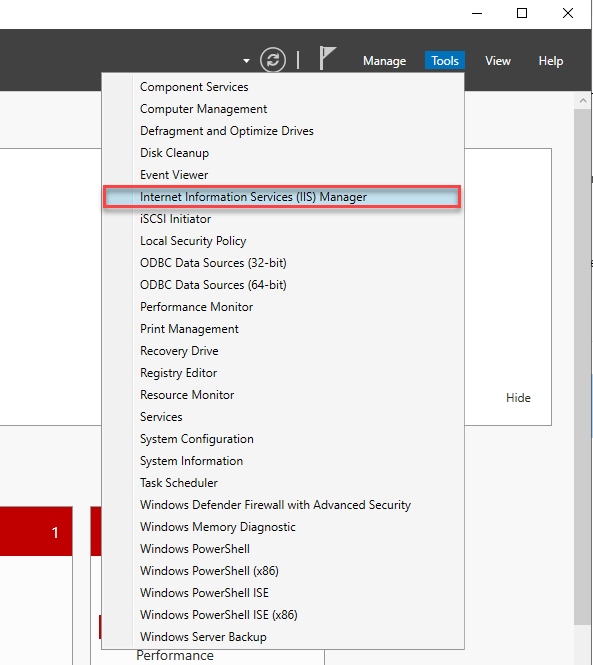
With Windows Server Manager, click on Tools and then IIS:
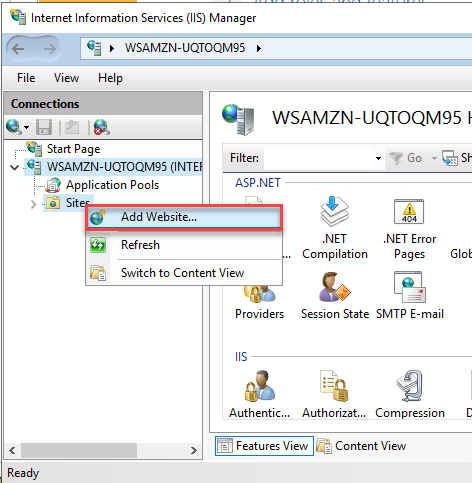
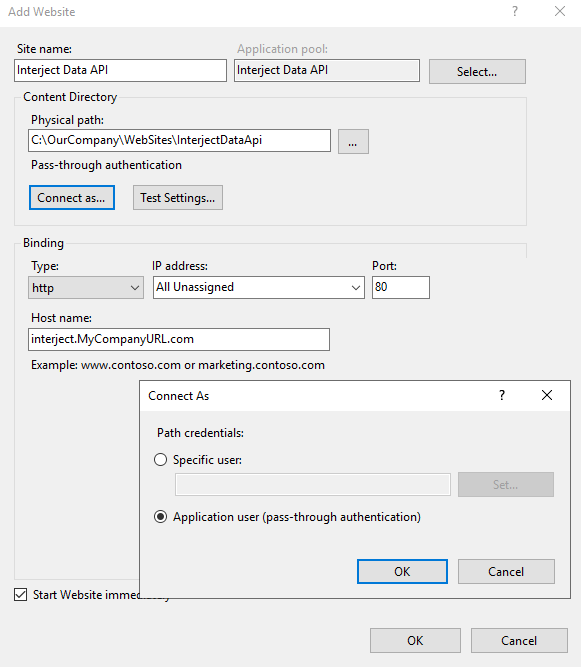
In the left explorer pane, right click "Sites" and then select "Add Website…"
The following IIS Settings will need to be setup for the website:
| Property | Description | Value |
|---|---|---|
| Site name | Identifies this site in IIS (only visible to the admin) | Enter a descriptive value |
| Application Pool | Set of configuration settings | Keep the default1 |
| Physical path | Source folder for the website | Enter the directory you set up in deployment |
| Pass-through authentication | Authentication used for protected resources | Keep the default setting "Application user" |
| Binding Type | Internet Security Protocol | HTTP or HTTPS2 |
| IP Address | Addresses the server will listen to | Keep the default setting "All Unassigned"3 |
| Port | Select a port for your website to run on | Unused port4 |
| Host name | (Optional) Enter a name for the website | Enter the name of the host |
1 Upon creation of the website, the default IIS behavior is a custom Application Pool is created matching the name of the website. This App Pool is preferred instead of the default App Pool.
2 If HTTPS is selected you will need to set up an SSL Certificate (not covered in this documentation - see here)
3 This setting can be left as the default or a specific IP address can be used if this web server responds to multiple IP addresses. It is more common to use a specific IP address when dealing with multiple SSL certificates on the same web server.
4 Normally follows the default 80 for HTTP and 443 for HTTPS, unless a network administrator requires an override. If a used port is entered, you will need to enter a host name.
An example of an API set up within a company's intranet is here:
For more info about setting up a website in IIS, see Add a Web Site.
Windows Host File
The Windows hosts file is typically used to manually map host names to IP addresses when DNS resolution is not available or when you want to test a website before making it publicly accessible. If you are testing locally (127.0.0.1) or want to use custom domains, you will need to edit this file.
The host file is located in the "System32" folder of your Windows installation:
C:\Windows\System32\drivers\etc\host
Open this file as an Administrator in order to save changes.

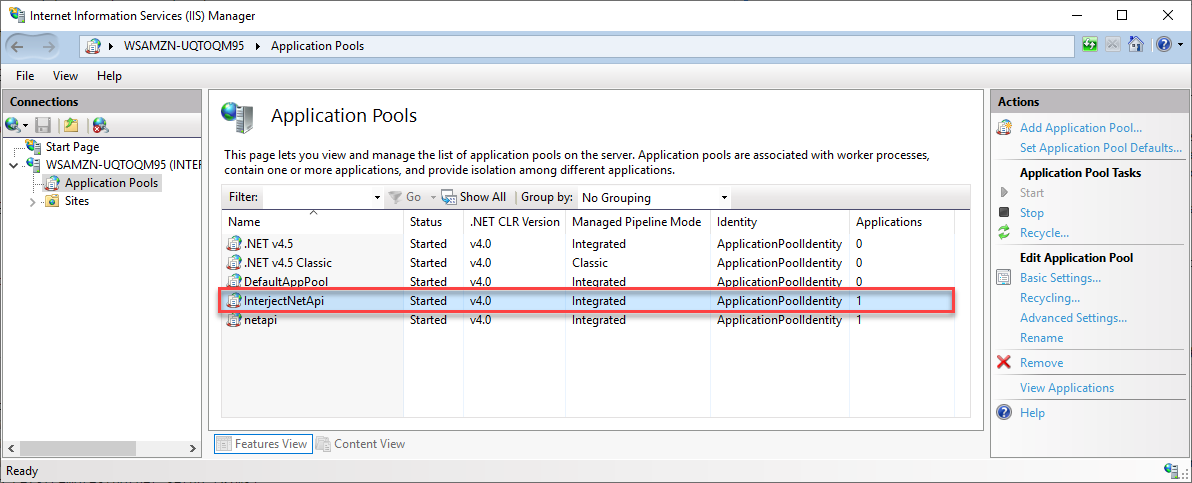
App Pool
The Application Pools can be viewed by selecting it in the left hand explorer. Verify the pool being used is v4.0 for the .NET CLR Version and is using an integrated pipeline.
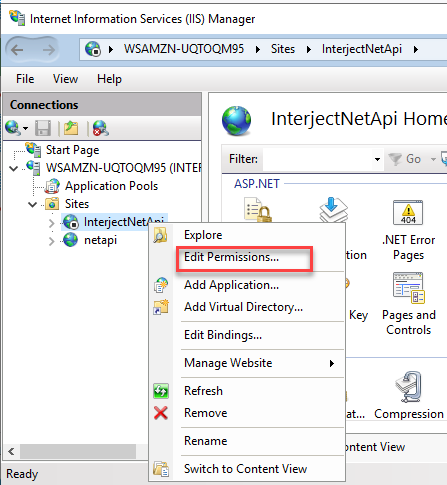
Setting Security Permissions
Depending on your use case, you may need to give the App Pool "modify" permissions. According to the least privilege principle, this is only advisable when necessary, for example for logging purposes or to allow file uploads.
Step 1: Right click the website and select "Edit Permissions…"
Step 2: On the Security tab, click Edit.
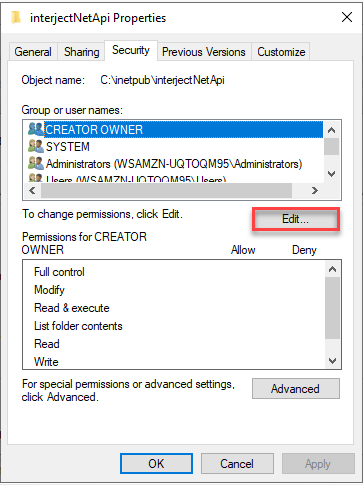
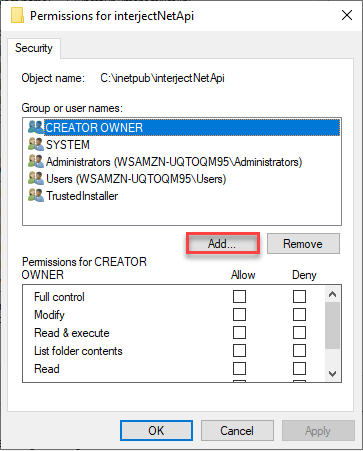
Step 3: You will need to first add the App Pool to the list of groups. Click on Add.
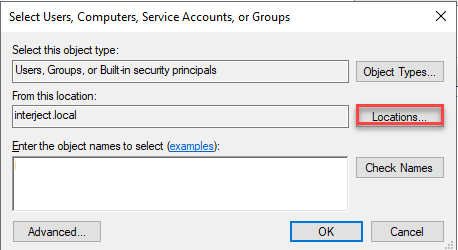
Step 4: To expand the search for the App Pool, you will need to select the root system. Click on Location.
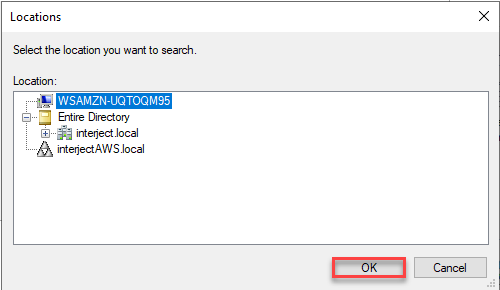
Step 5: Select the root system name and click OK.
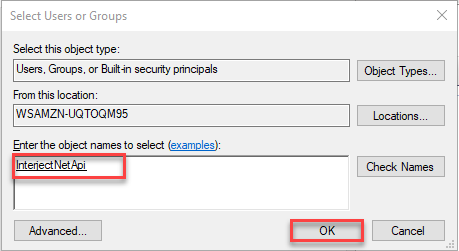
Step 6: For the object names to select, enter the following and click Check Names:
IIS AppPool\<Site Name>

The App Pool name should appear underlined. Click OK to add the App Pool to the list of groups.
Step 7: Now that the App Pool has been added to the group entities, ensure the Modify permission is checked for it.
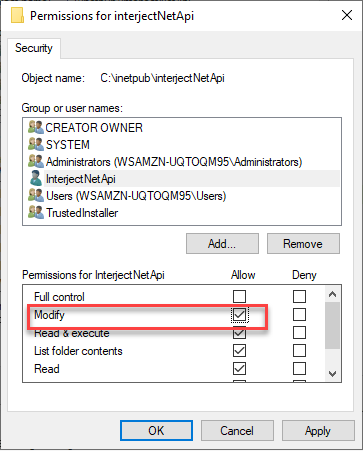
Finally click Apply and then OK twice to save the changes.
Firewall
When setting up a website in Internet Information Services (IIS), you may need to edit your firewall permissions to allow incoming traffic to the web server. This is an important step in making your website accessible to users over the network.
Testing
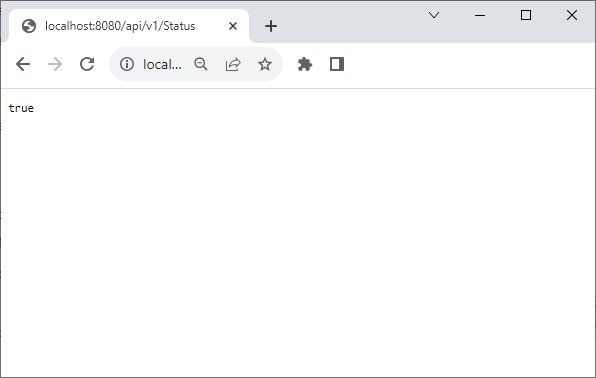
At this point, the server in IIS should be running.
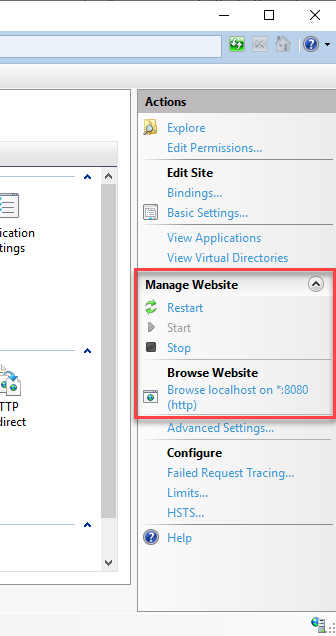
To confirm the API is working, navigate to the host name or port you set up previously and access the status endpoint ("api/v1/status"). You should see "true" if the API is working.
Connection Strings
The most common use of a Data API is for Intranet use. In this scenario a connection string can be shared by all users, while also protected within the Data API.
Interject supports Data Portal connections for both direct DB access and API access. When using an API, you can code the API to perform certain DB actions by using "PassThrough" settings. These are configured in the Data Portal and Data Portal Connection. For these to work, they need to be able to find a connection string in the API.
If this API offers public access, then connection strings should not be shared in the web.config file. Instead a custom validation lookup process should be implemented, which also requires some custom coding. This Data API uses a appsettings.json file for this purpose.
- Determine a meaningful name for the connection string (preferably without spaces) This name will be used by an Interject Data Portal Connection, and it will reference the connection string within the
appsettings.json. Names must be unique. - Open the
appsettings.jsonfile (in theinterject-dotnet-apidirectory) in any text editor or code IDE. - Add a new entry in the list of ConnectionStrings collection.
Example of a connection string entry:
"Connections": {
    "ConnectionStrings": [
        {
        "Name": "localhost",
        "ConnectionString": "Data Source=(local);Initial Catalog=interject_demos;Encrypt=False;Integrated Security=True"
        }
    ]
}
Connecting to Interject
With the API running and connection strings stored in the appsettings.json file, you can connect the Interject Add-in by setting up a Data Connection and Data Portal on the Portal Site.
For how to set up an API Data Connection, see Portal: API Connection. For Data Portals, see Data Portals.
Interject Docs
For more information on the Data API, you can refer to the docs in the repo. These docs pertain to setting up Interject reports and functions. They are found in the examples directory:
| File | Description |
|---|---|
| example.xlsx | An example Excel workbook that interacts with the API endpoints |
| formula_jcolumndef | How to set up the jColumnDef formula |
| portal_parameters | How to set up Interject parameters |
| report_fixed | How to set up an Interject ReportFixed |
| report_range | How to set up an Interject ReportRange |
| report_save | How to set up an Interject ReportSave |
| report_variable | How to set up an Interject ReportVariable |
| handler_pipeline | How to work with the RequestHandler pipeline to set up a SQL data connection and controller |
| user_message | How to send messages back to the Interject from the API |