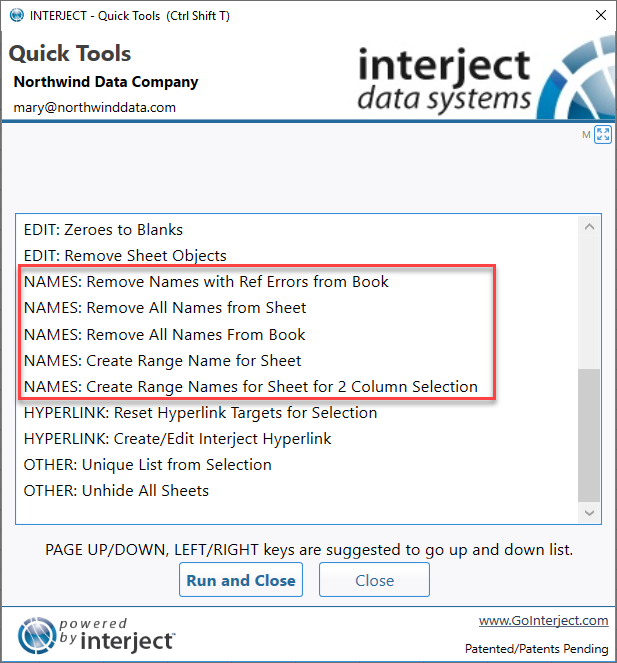
Quick Tools - Names Tools
Estimated reading time: 8 minutesOverview
The Names Tools within Quick Tools deal with defined names. Working with names is sometimes cumbersome within Excel. The Quick Tools makes the process easier and more convenient.
Excel Name Manager
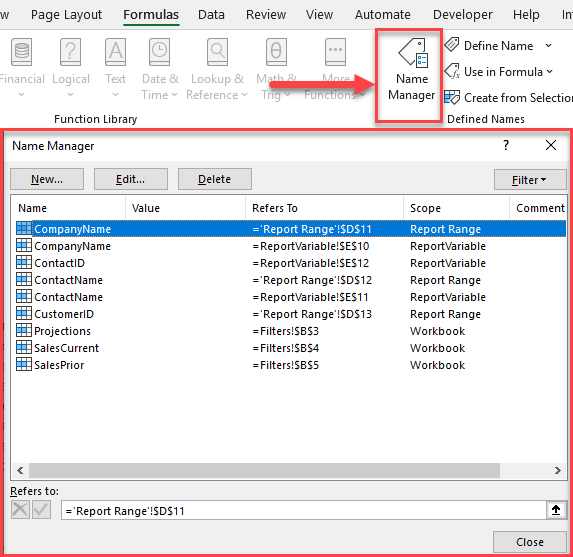
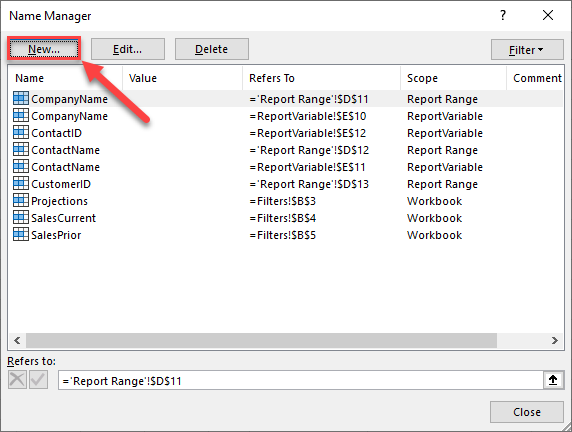
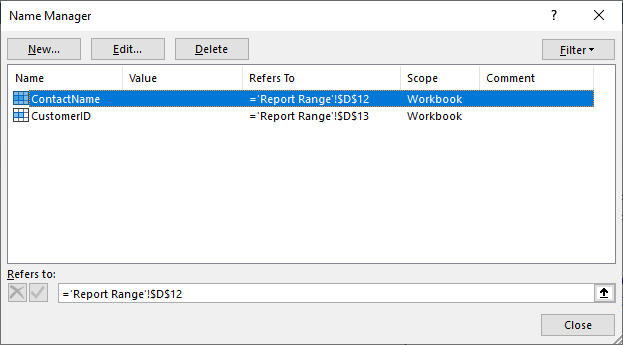
For reference: To view all the names within the Workbook, click on "Name Manager" on the Formulas tab:
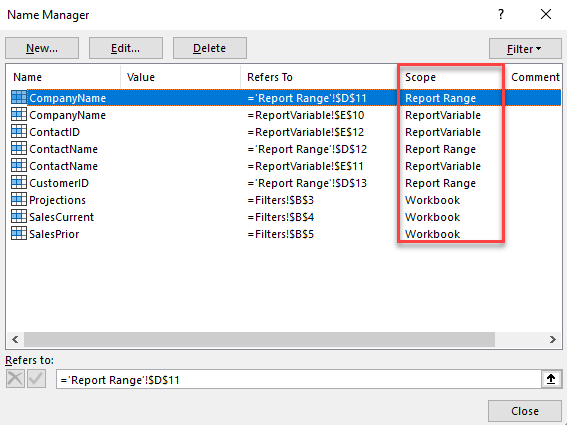
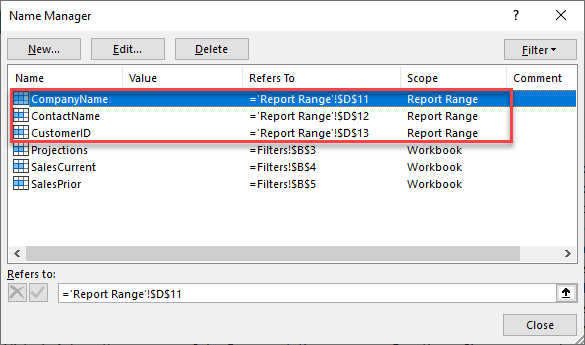
Each name has a scope, which can refer to a single sheet or the entire Workbook. The default scope when Excel creates a name is the Workbook. However, when a name is scoped to a single sheet, you can have multiple names with the same name, each referring to a single sheet. Notice there are 3 names that are scoped to the sheet "ReportVariable" and 3 similar names scoped to "ReportRange":
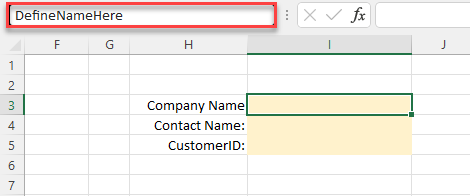
You can define a name that is scoped to the entire Workbook by selecting the range and entering the name in the Name Box:
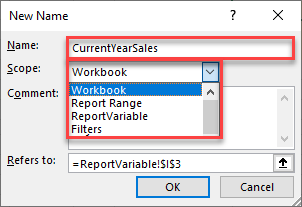
To create a name scoped to a single sheet the Excel way, you have to use the Name manager. Select the range and click "New" from the Name Manger:
Next, give the range a name and defined the scope:
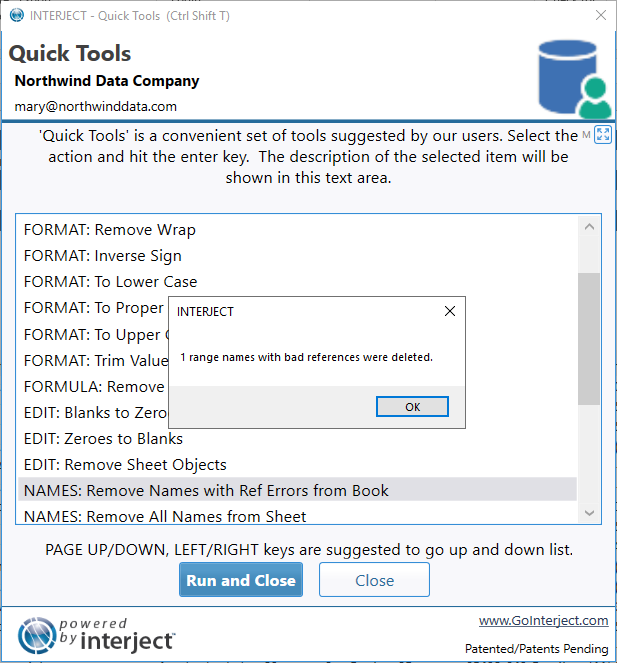
Remove Names with Ref Errors from Book
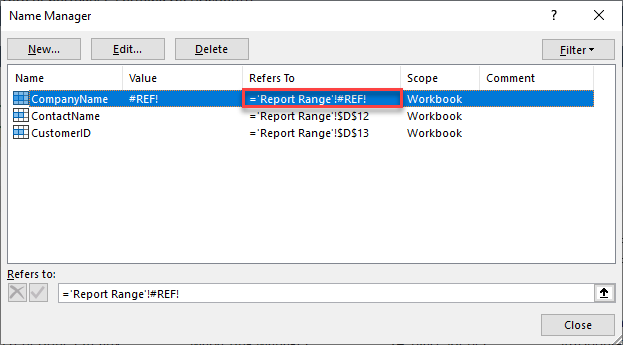
Removes all named ranges in the Workbook with invalid references (Ref!).
Invalid references happen when cells refer to another cell that has been deleted. In such a case, Excel will display "Ref!" instead of the valid reference to indicate it is an invalid reference.
Before:
This name refers to a cell that is currently invalid:
After:
Remove All Names from Sheet
Removes all user named ranges that are scoped to the current sheet.
Before:
There are 3 names that are scoped to the current sheet "ReportRange":
After:
Remove All Names from Book
Removes all user named ranges in the entire Workbook.
Note: This will still retain certain Excel predefined names such as Print_Titles & Print_Area.
Before:

After:
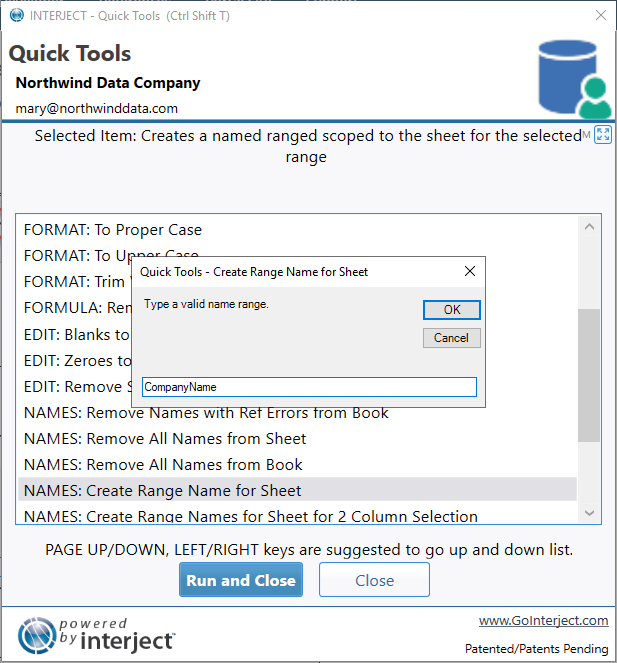
Create Range Name for Sheet
Creates a named range (Sheet scoped) for current cell or selected range.
Before:
First select the range you want to define:
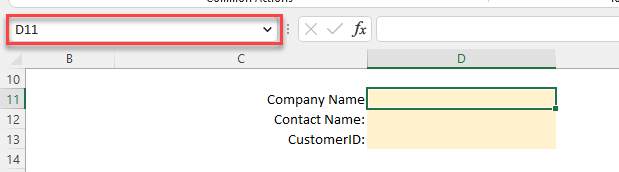
Create a name for the range:
After:
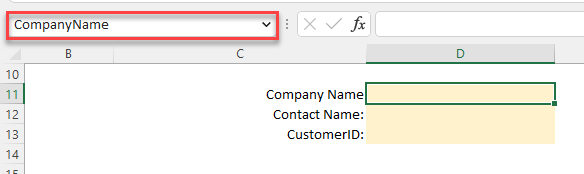
Notice the new name is defined to the sheet "ReportRange":

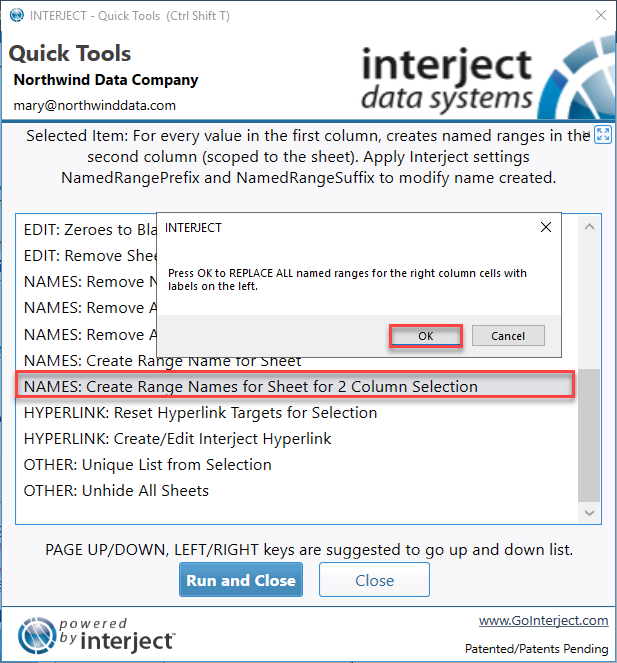
Create Range Names for Sheet for 2 Column Selection
Creates a named range or multiple names (Sheet scoped) for right side column cells, the names of which are supplied in the left side column cells (selection must be 2 columns and max 30 rows).
Before:
First select the 2 column range you want to create names for:
Next open up the Interject Quick Tools and select the tool and click OK:
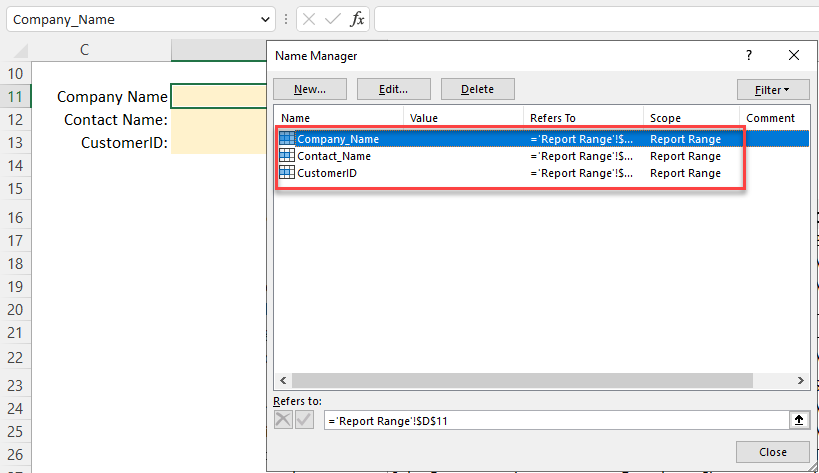
After:
Notice 3 names were created correspond to the entries in the left column and they are all scoped to the sheet:
Appending A Prefix and/or Suffix To A Name
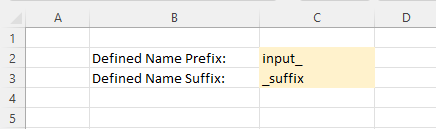
Interject can automatically have a prefix and/or suffix appended to a defined name when you create it using Quick Tools. For example, you may want to append the prefix "input_" to your filter names. You can also fix a suffix to the named ranges. It is best to include these config settings in a separate sheet.
Step 1: Open up a new Excel tab called "InterjectConfig".

Step 2: Select an empty spot within the sheet to store your prefix and suffix.
Step 3: Select an empty cell and give it the named range of "InterjectConfig_Settings".

Step 4: Interject will find any json pair in this named range to use. To have Excel format a json pair using the prefix and suffix set up, you can use the Interject jSetting function. This function automatically formats a pair into json form. In the cell with the named range, enter the following:
=jSetting("NamedRangePrefix", C2)&jSetting("NamedRangeSuffix",C3)
The configurations are now set up.

Step 5: Now select the 2 columns you want to create names for:
Step 6: Next open up the Interject Quick Tools and select the tool and click OK:
Notice the defined names have the prefix and suffix you just set up:
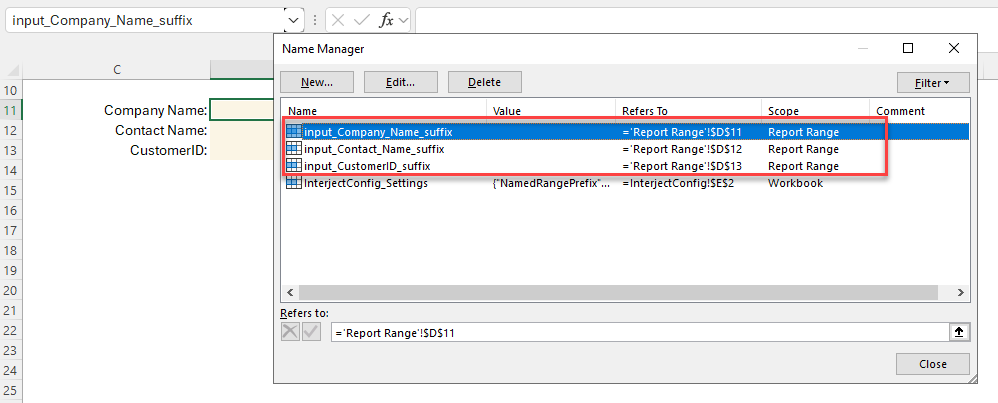
Note: The named range "InterjectConfig_Settings" can be scoped to the entire workbook or a particular sheet. Interject will apply the settings from the current sheet if they exist, otherwise it will apply the settings that are workbook scoped.</blockquote>